Beginner Guide For Steel Mace 360s
If you’re in need of some straight forward advice on how to get started with 360s with your steel mace. Check out my latest video, Beginner Guide for Steel Mace 360s below showing you how to get started:
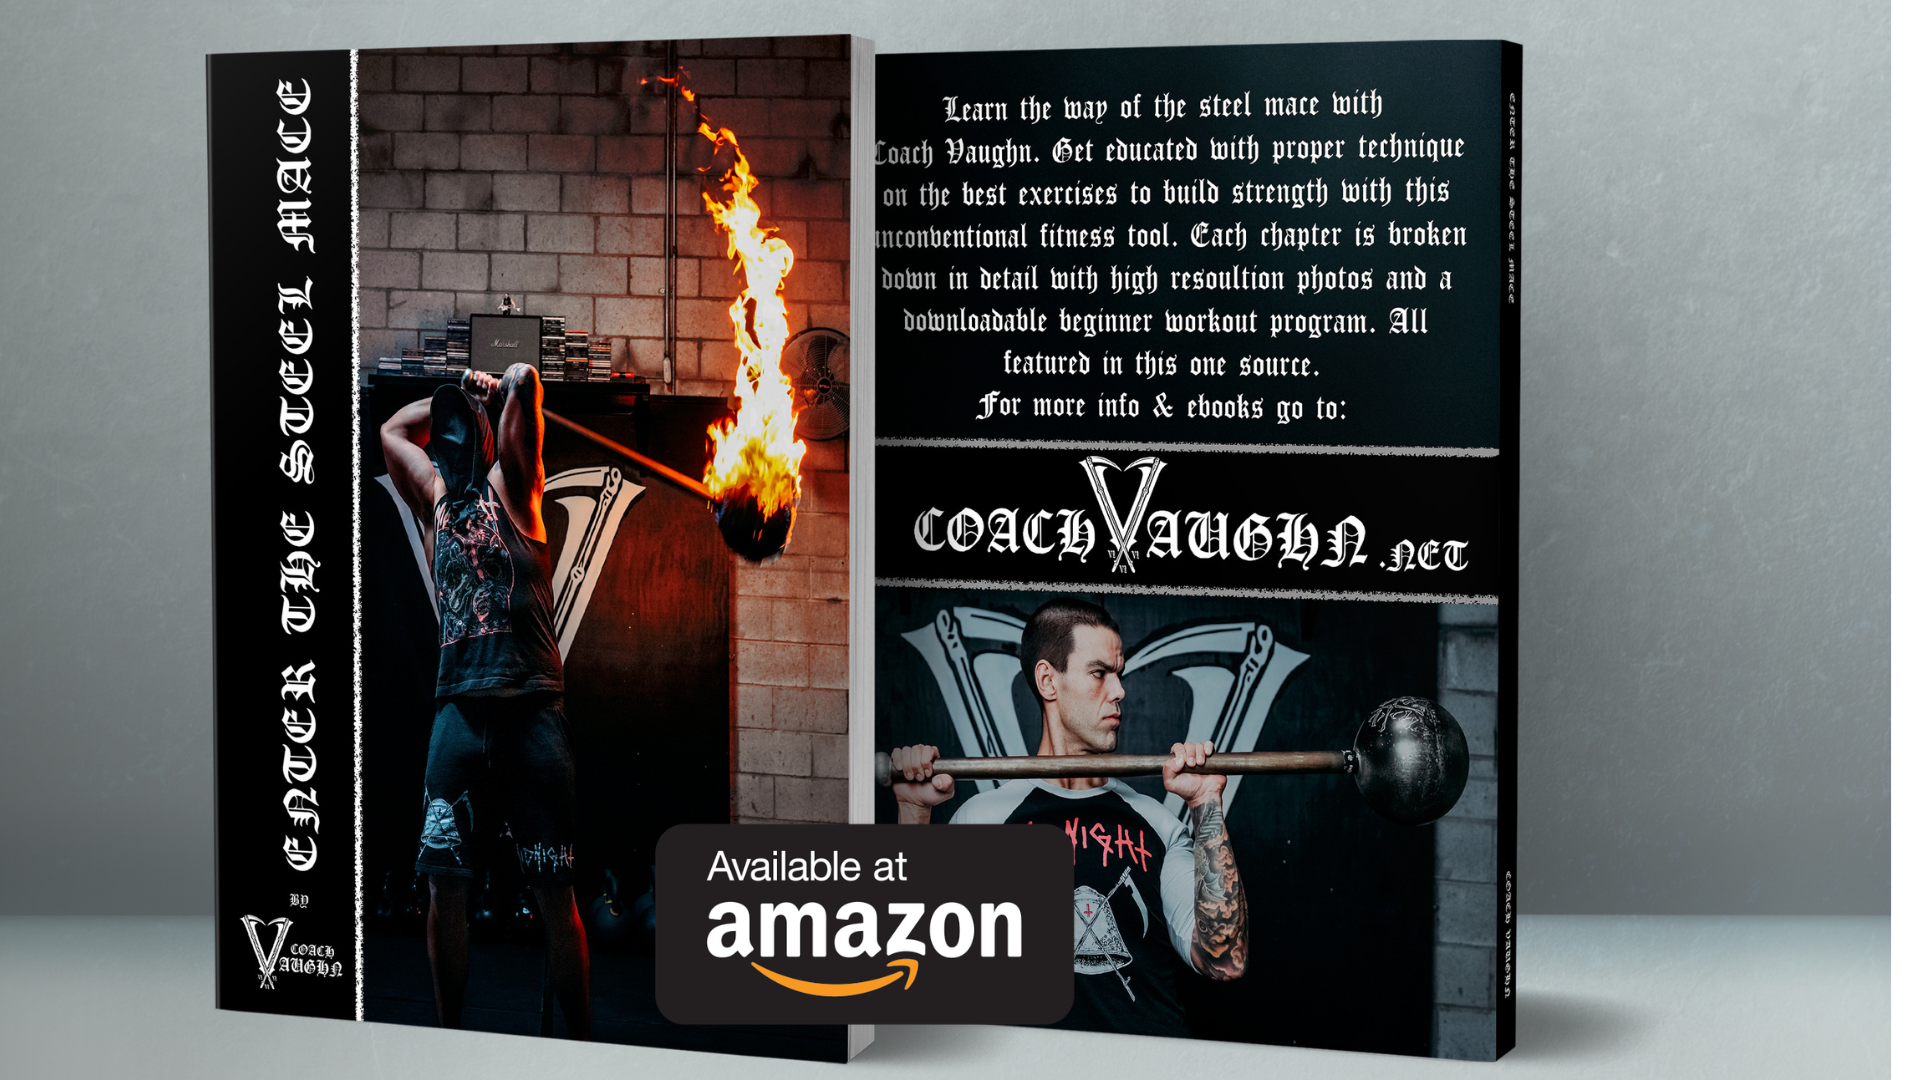
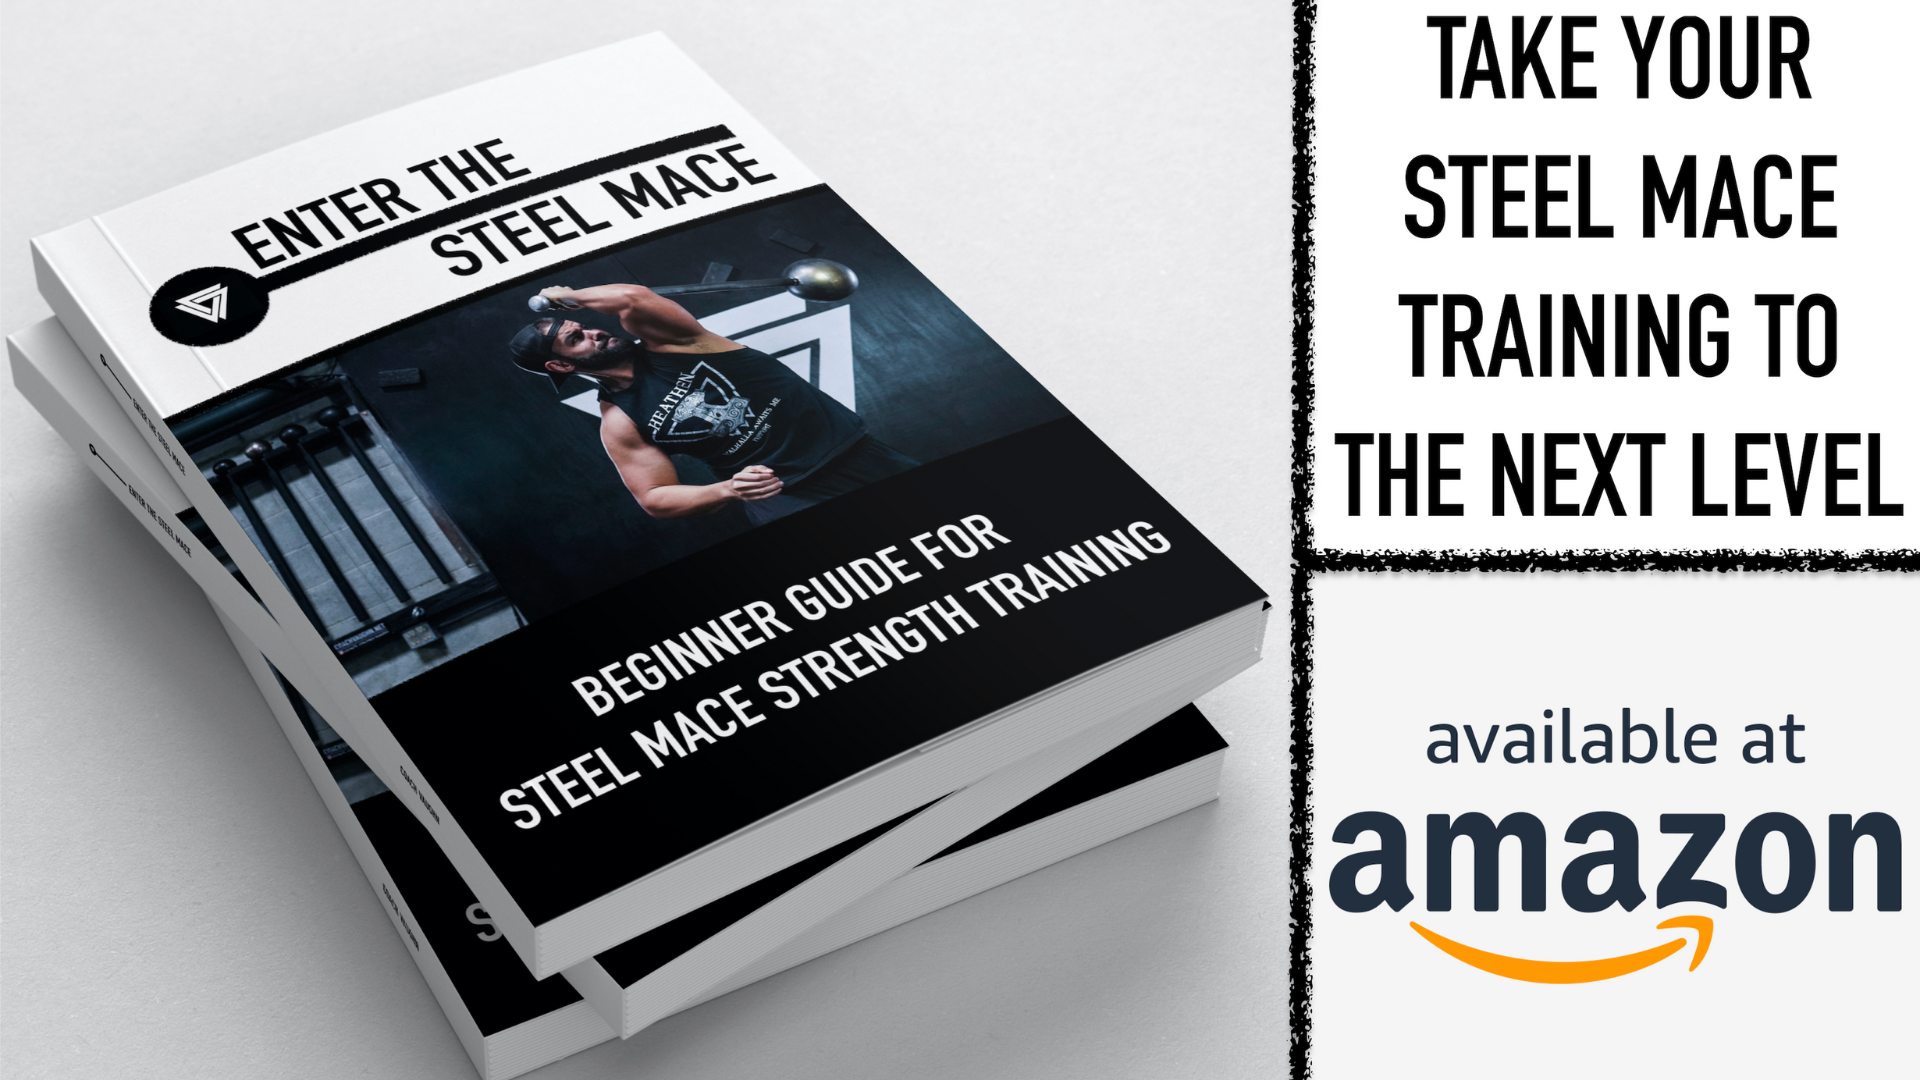
If you need more guidance, I have a whole book dedicated to steel mace education for beginners called, Enter The Steel Mace. Now available on Amazon in paperback, hardcover, and kindle format. With descriptive text, HD photos, and details to make this beginner steel mace guide stronger than ever. I filmed all the video demos specifically for this book’s beginner workout program, and features a QR code inside to download it. So you’re getting hundreds of HD descriptive photos, and video demos all in one source:
2nd Edition of Enter The Steel Mace Now Available
Crazy to think I wrote this book over 6 years ago, and the time has come for a 2nd edition of Enter The Steel Mace. Now available on Amazon in paperback, hardcover, and kindle format. With updated text, photos, and details to make this beginner steel mace guide stronger than ever. I also re-filmed all the video demos specifically for this book’s beginner workout program, and features a QR code inside to download it. So you’re getting hundreds of HD descriptive photos, and video demos all in one source:
CLICK HERE to get your copy now

Is The Rogue Mace Worth It?
In the past decade, the supply & demand for steel maces has fluctuated greatly. In 2014, Onnit was the “go to” company when I was looking for steel maces online, and Kabuki Strength’s ShouldeRök was the most known loadable mace. Bigger companies like Amazon and Rogue did not even sell maces until post 2020; as it became a popular home workout tool during the pandemic. Today, Onnit has ditched their fitness equipment line (being bought out by Johnson & Johnson), and now focus on supplements. Kabuki Strength imploded: having horrible customer service, not fulfilling orders, and is no longer in business. Amazon now offers multiple brands of affordable steel maces with their competitive prime shipping rates, and Rogue Fitness capitalized releasing their version of a loadable mace with this market shift.
Rogue needs no introduction in the fitness industry creating quality USA made products for decades. Their catalog of innovative products has grown beyond barbell equipment, and become the gold standard in home gym equipment with their precision laser cut aesthetics. How do I know? I’ve been buying from them since I’ve been into steel maces since 2014, and have had zero issues with anything Rogue branded. So when Rogue announced their own Loadable Mace was dropping in 2024 — I was instantly curious, and bought one. This release meant maces are hitting new heights in popularity.
However, I will fully admit I’m bias toward the category of “loadable maces” in the recent years because most contradict the simple fact that a mace is supposed to be a asymmetrically loaded tool. Most need a thicker handle to secure a barbell sleeve for smaller 5-10LB weight plates, and then a durable collar to secure the weight. In contrast, a fixed weighted 25LB steel mace and a 25LB loadable mace will feel vastly different because of the weight distribution, and handle length.
So with all this in perspective, is the Rogue Mace worth the money?
Suggestions For The Right Size:
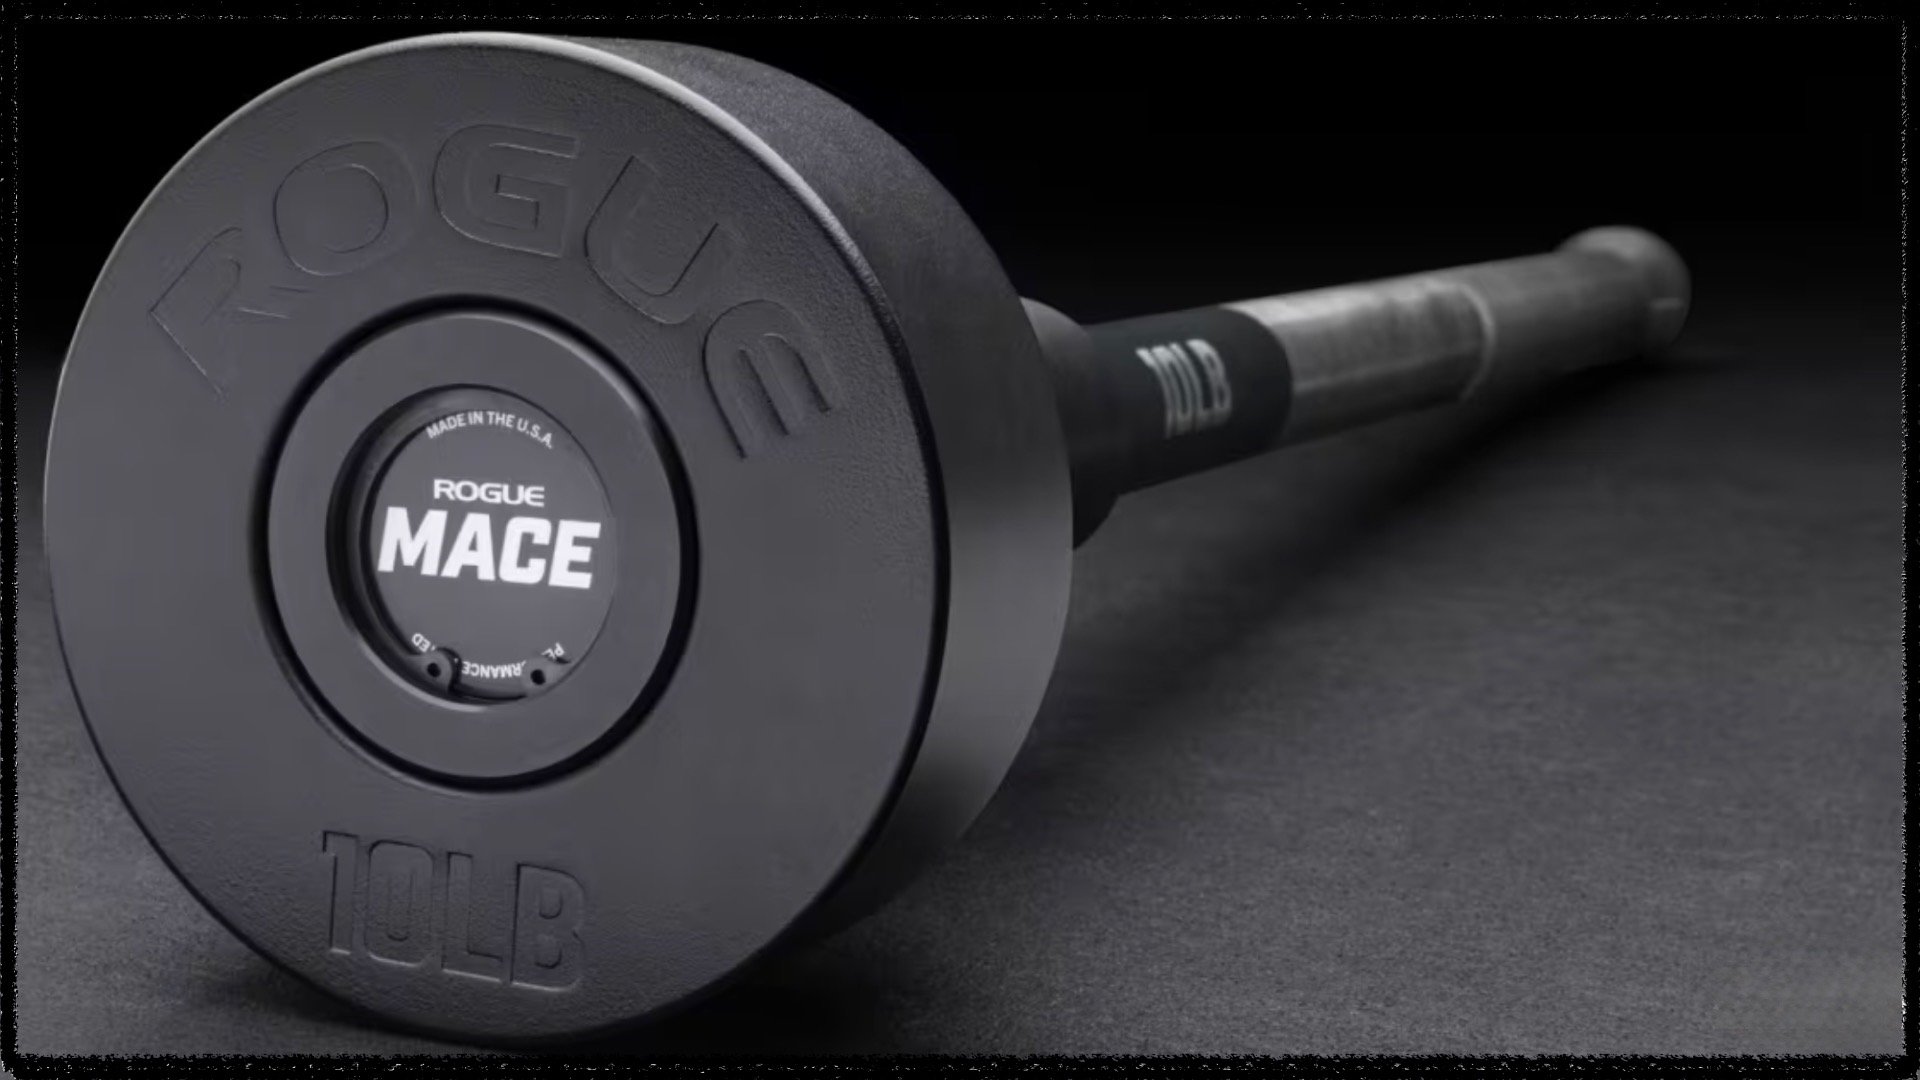
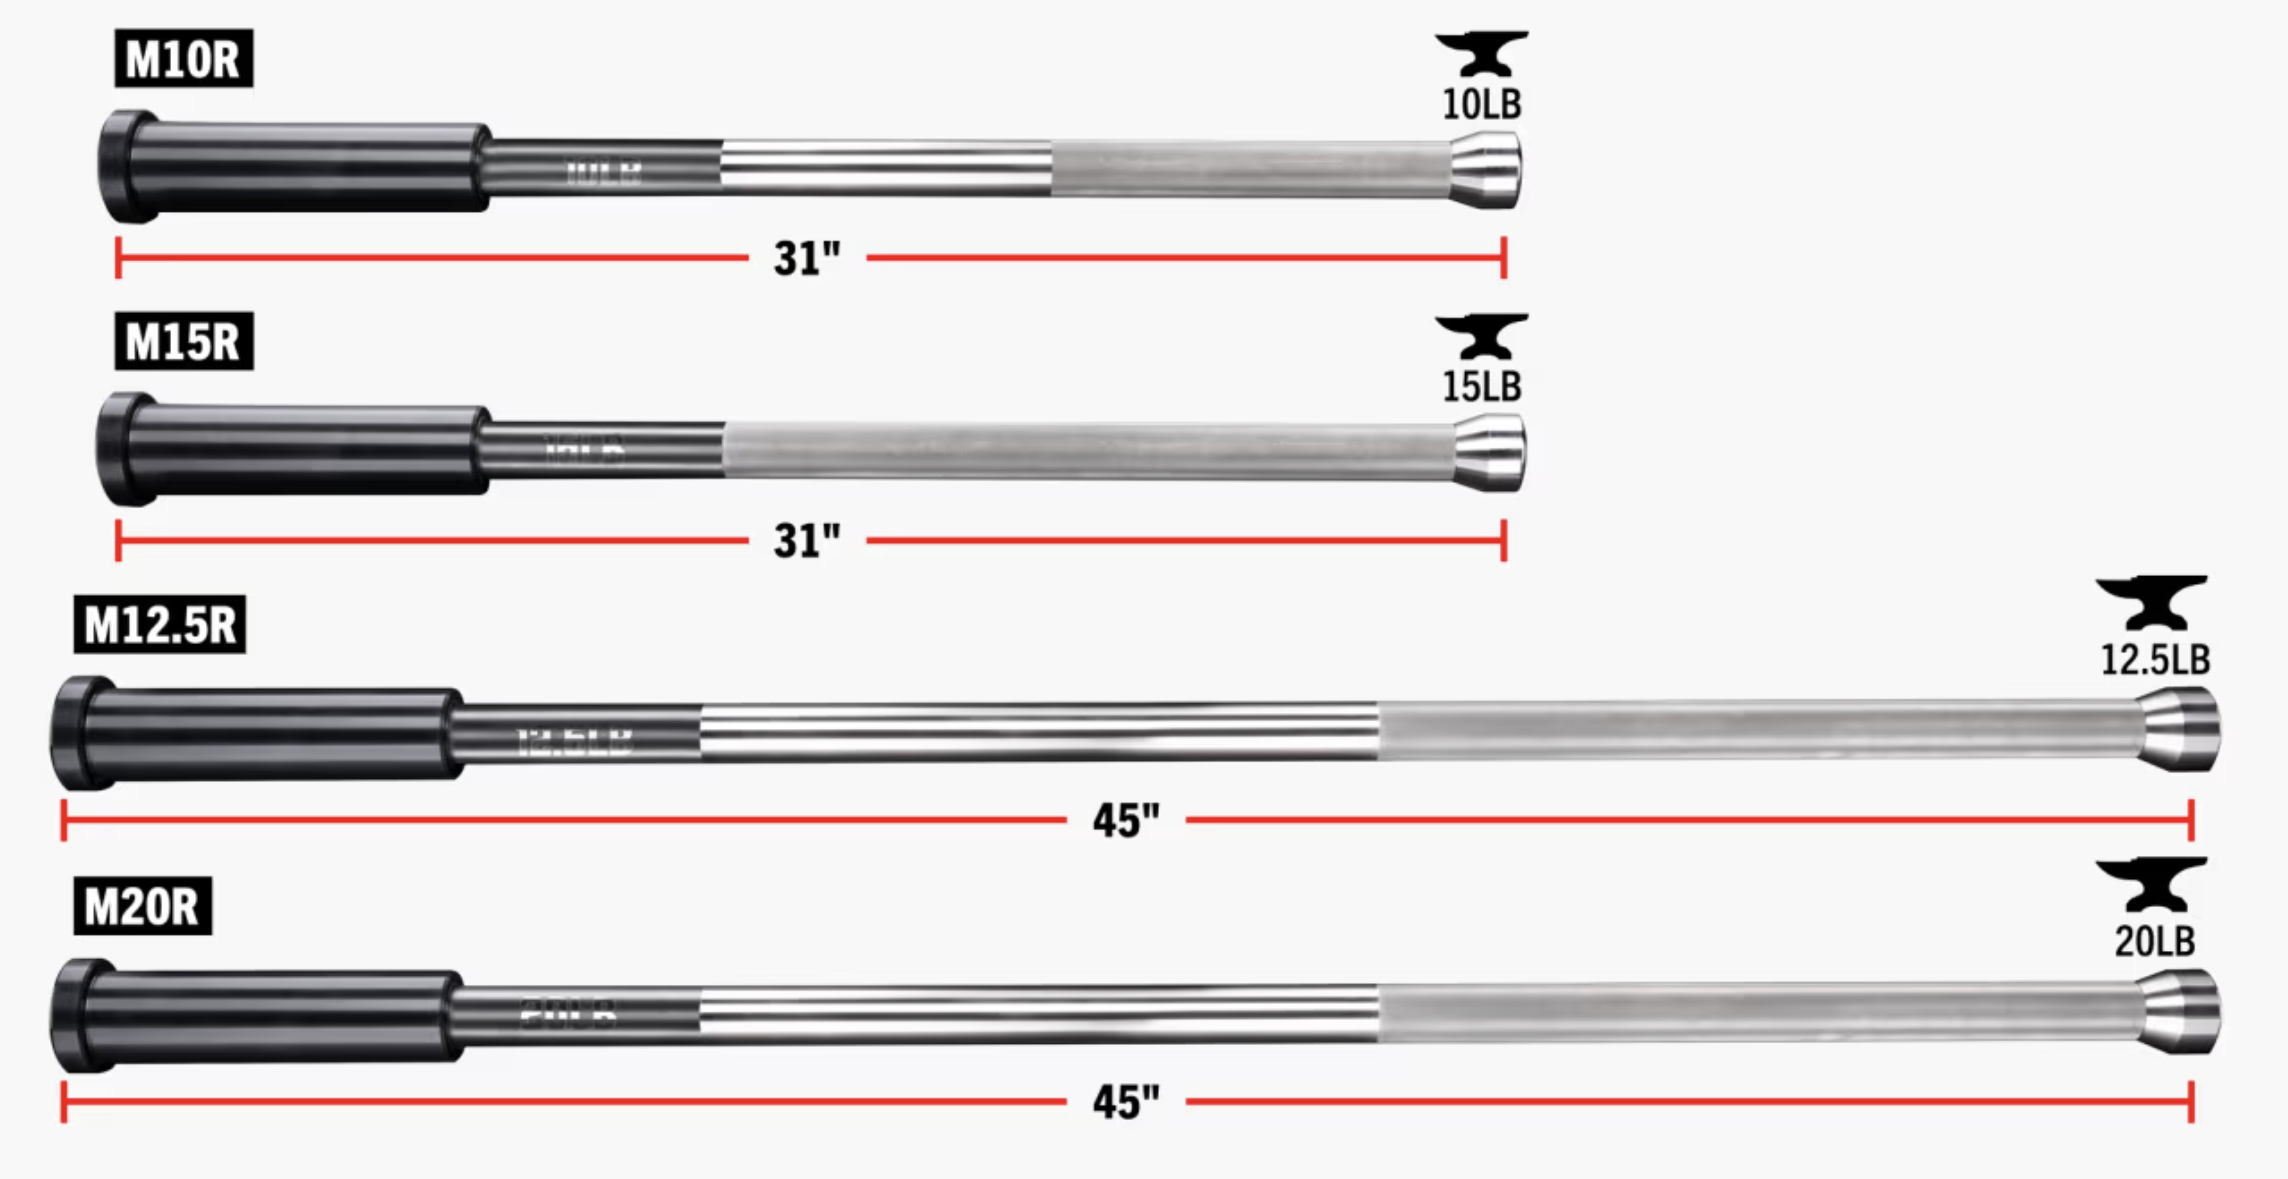
As a important note for this review I bought the 15LB “Solid Stainless Steel” Rogue Mace (M15R) — out of the two sizes they had available at the time in 2024. They now offer two new lighter maces with a “Hollow Stainless Steel” handle as stated here in their description off their website:
“The Rogue Mace is fully machined and assembled in the Rogue factory in Columbus, Ohio. The shaft for the 15LB and 20LB versions start with solid stainless steel that is machined down and knurled into a 32MM diameter shaft. The 33.5MM hollow shaft on the lighter 10LB and 12.5LB maces are machined to spec and each feature an ideal knurl that is light enough not to tear your hands, but has enough "stick" to provide optimal grip. The pommel at the end of the shaft is machined from a solid billet of stainless steel, further enhancing the quality and feel of the mace. The sleeve of the mace is precision machined to tolerances that leave minimal end float, providing a secure and smooth rotation.”

If I were to pick again, I would’ve much rather have gotten the M12.5R because of the 45inch hollow shaft, and thus increase the weight distribution to the loaded barbell sleeve. With that said, the M20R (20LB) would overkill most’s beginner’s elbows, and I would advise not even considering that weight with experience, and is why I originally choose the 15LB at shorter length of 31inches. So a major positive Rogue added these two lighter “hollow”options, but would advise they just take out the 20LB Solid Stainless Steel. As a coach, the average beginner needs only 10-15LB steel mace, and going anywhere near 20-30LBS will stop you dead in your tracks movement wise.
The Look & Feel:
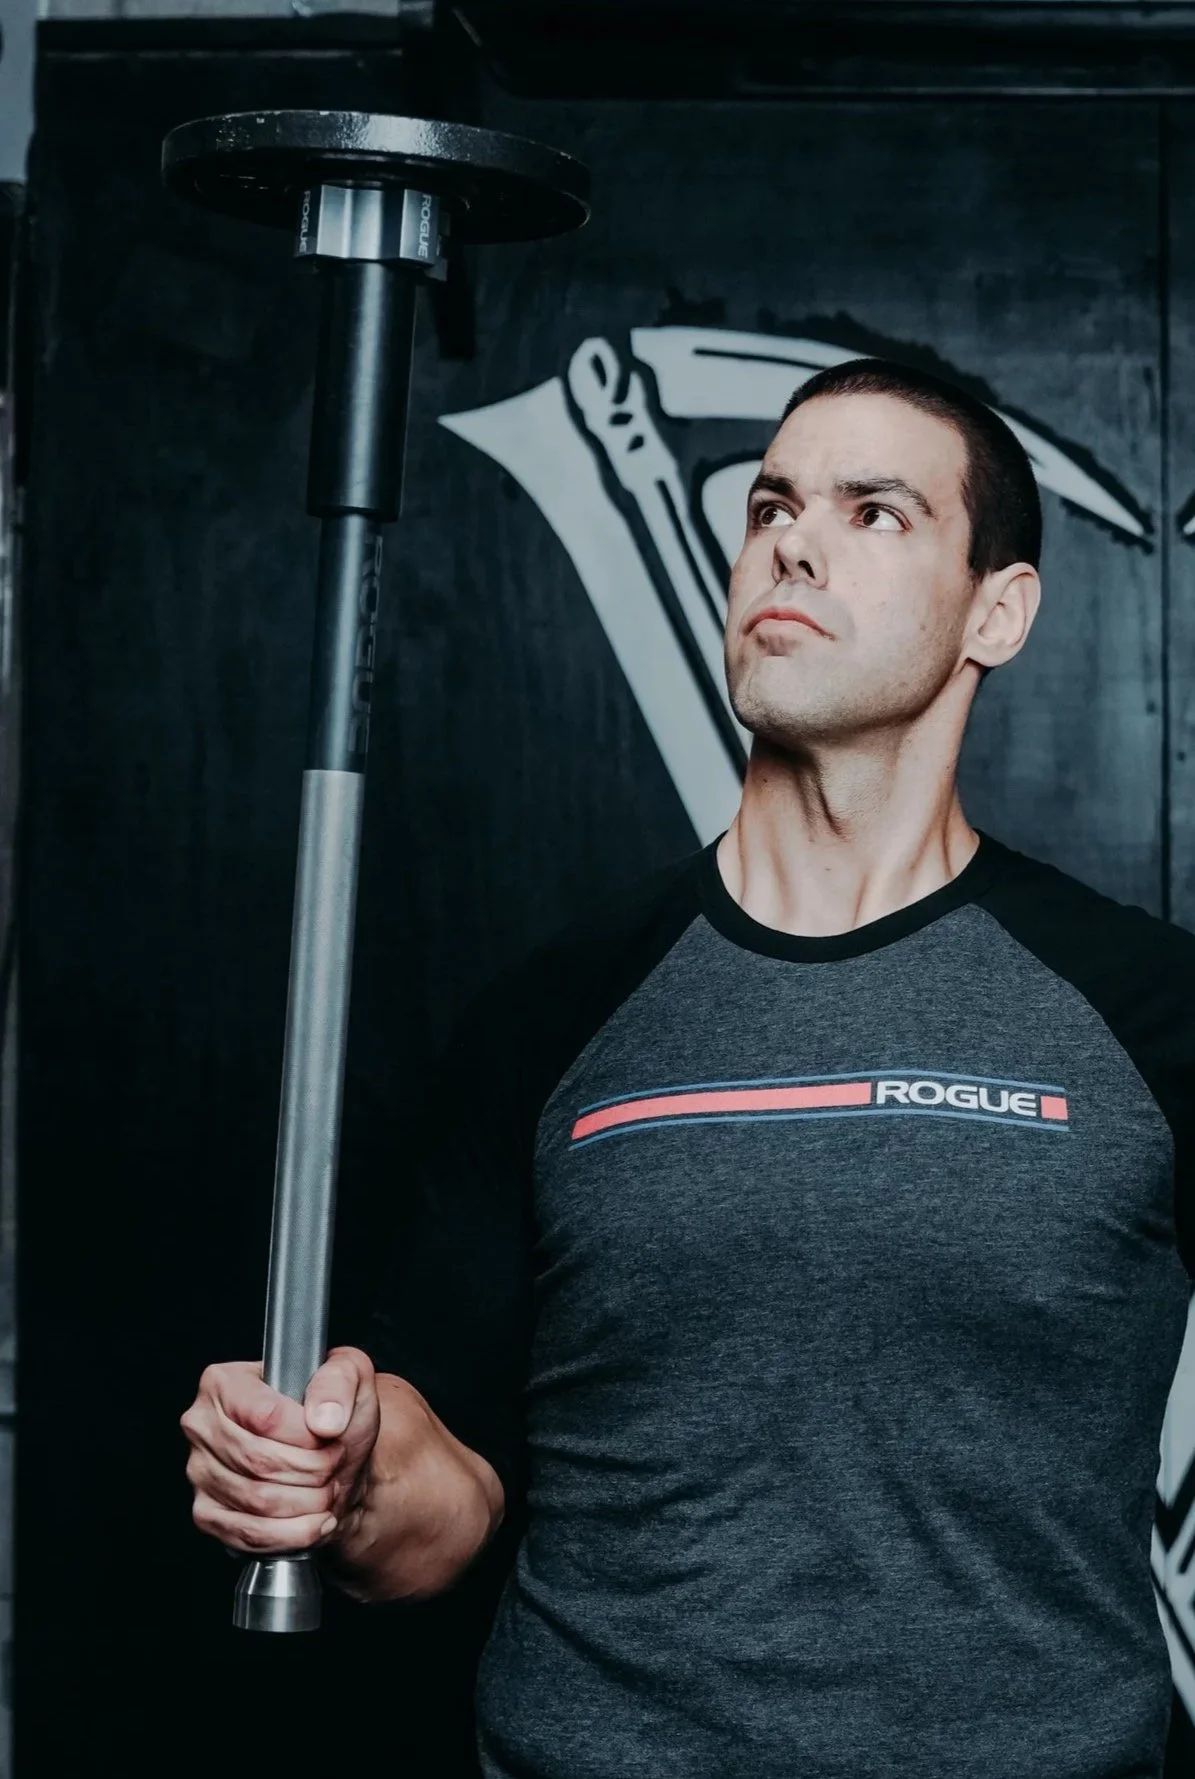
When getting anything Rogue delivered to your door, there is an excitement and absolute high when pulling out a brand new piece of equipment right out the box, and admiring it’s sheer machined steel beauty. This (M15R) Rogue Mace did not disappoint on that aspect with it’s solid stainless steel handle, and knurling. Then the matte black sleeve was incredibly dense, and well made. The second I held this thing, I had zero insecurities if this thing would ever break, and could be used for a zombie apocalypse in the future. Specifically on the sleeve, Rogue claims:
“The matte black sleeve used on the Rogue Mace uses a new process that effectively transforms the surface of the steel rather than coating it. This greatly improves the sleeves’ corrosion resistance, impact resistance, and abrasion resistance. Proprietary matte black sleeves will typically maintain their appearance much longer than traditional sleeve finishes, even through regular everyday use.”

Typical barbell sleeves are meant for very straight forward and linear movement patterns, and while this Rogue Loadable Mace looks like a barbell cut in half — they added a stronger coating to this sleeve since there more application to swing this in a 360 degree motions. Rogue really out did themselves with this small, but major detail I’ve never seen with other loadable maces.
The X-Factor: Bushing During 360s:
In the past, I’ve reviewed other overrated loadable maces, like the retired Kabuki ShouldeRök. It was incredibly unsafe to use for 360s because it had a screw on nut, and 2.5inches of threaded loading space. Every time I swung it, the nut became loose from the centrifugal force of the 360, and I never returned a piece of equipment so fast in my life (no surprise they’re no longer in production). Rogue must’ve took notice of the ShouldeRök’s red flags, and made theirs with 7.5inches of loading space (that’s 3x more in case you’re reading this Chris Duffin). To fully secure the weight plates, Rogue implements their branded 2.0 OSO Barbell Collar that has a rubberized interior to increase surface friction against to the sleeve.
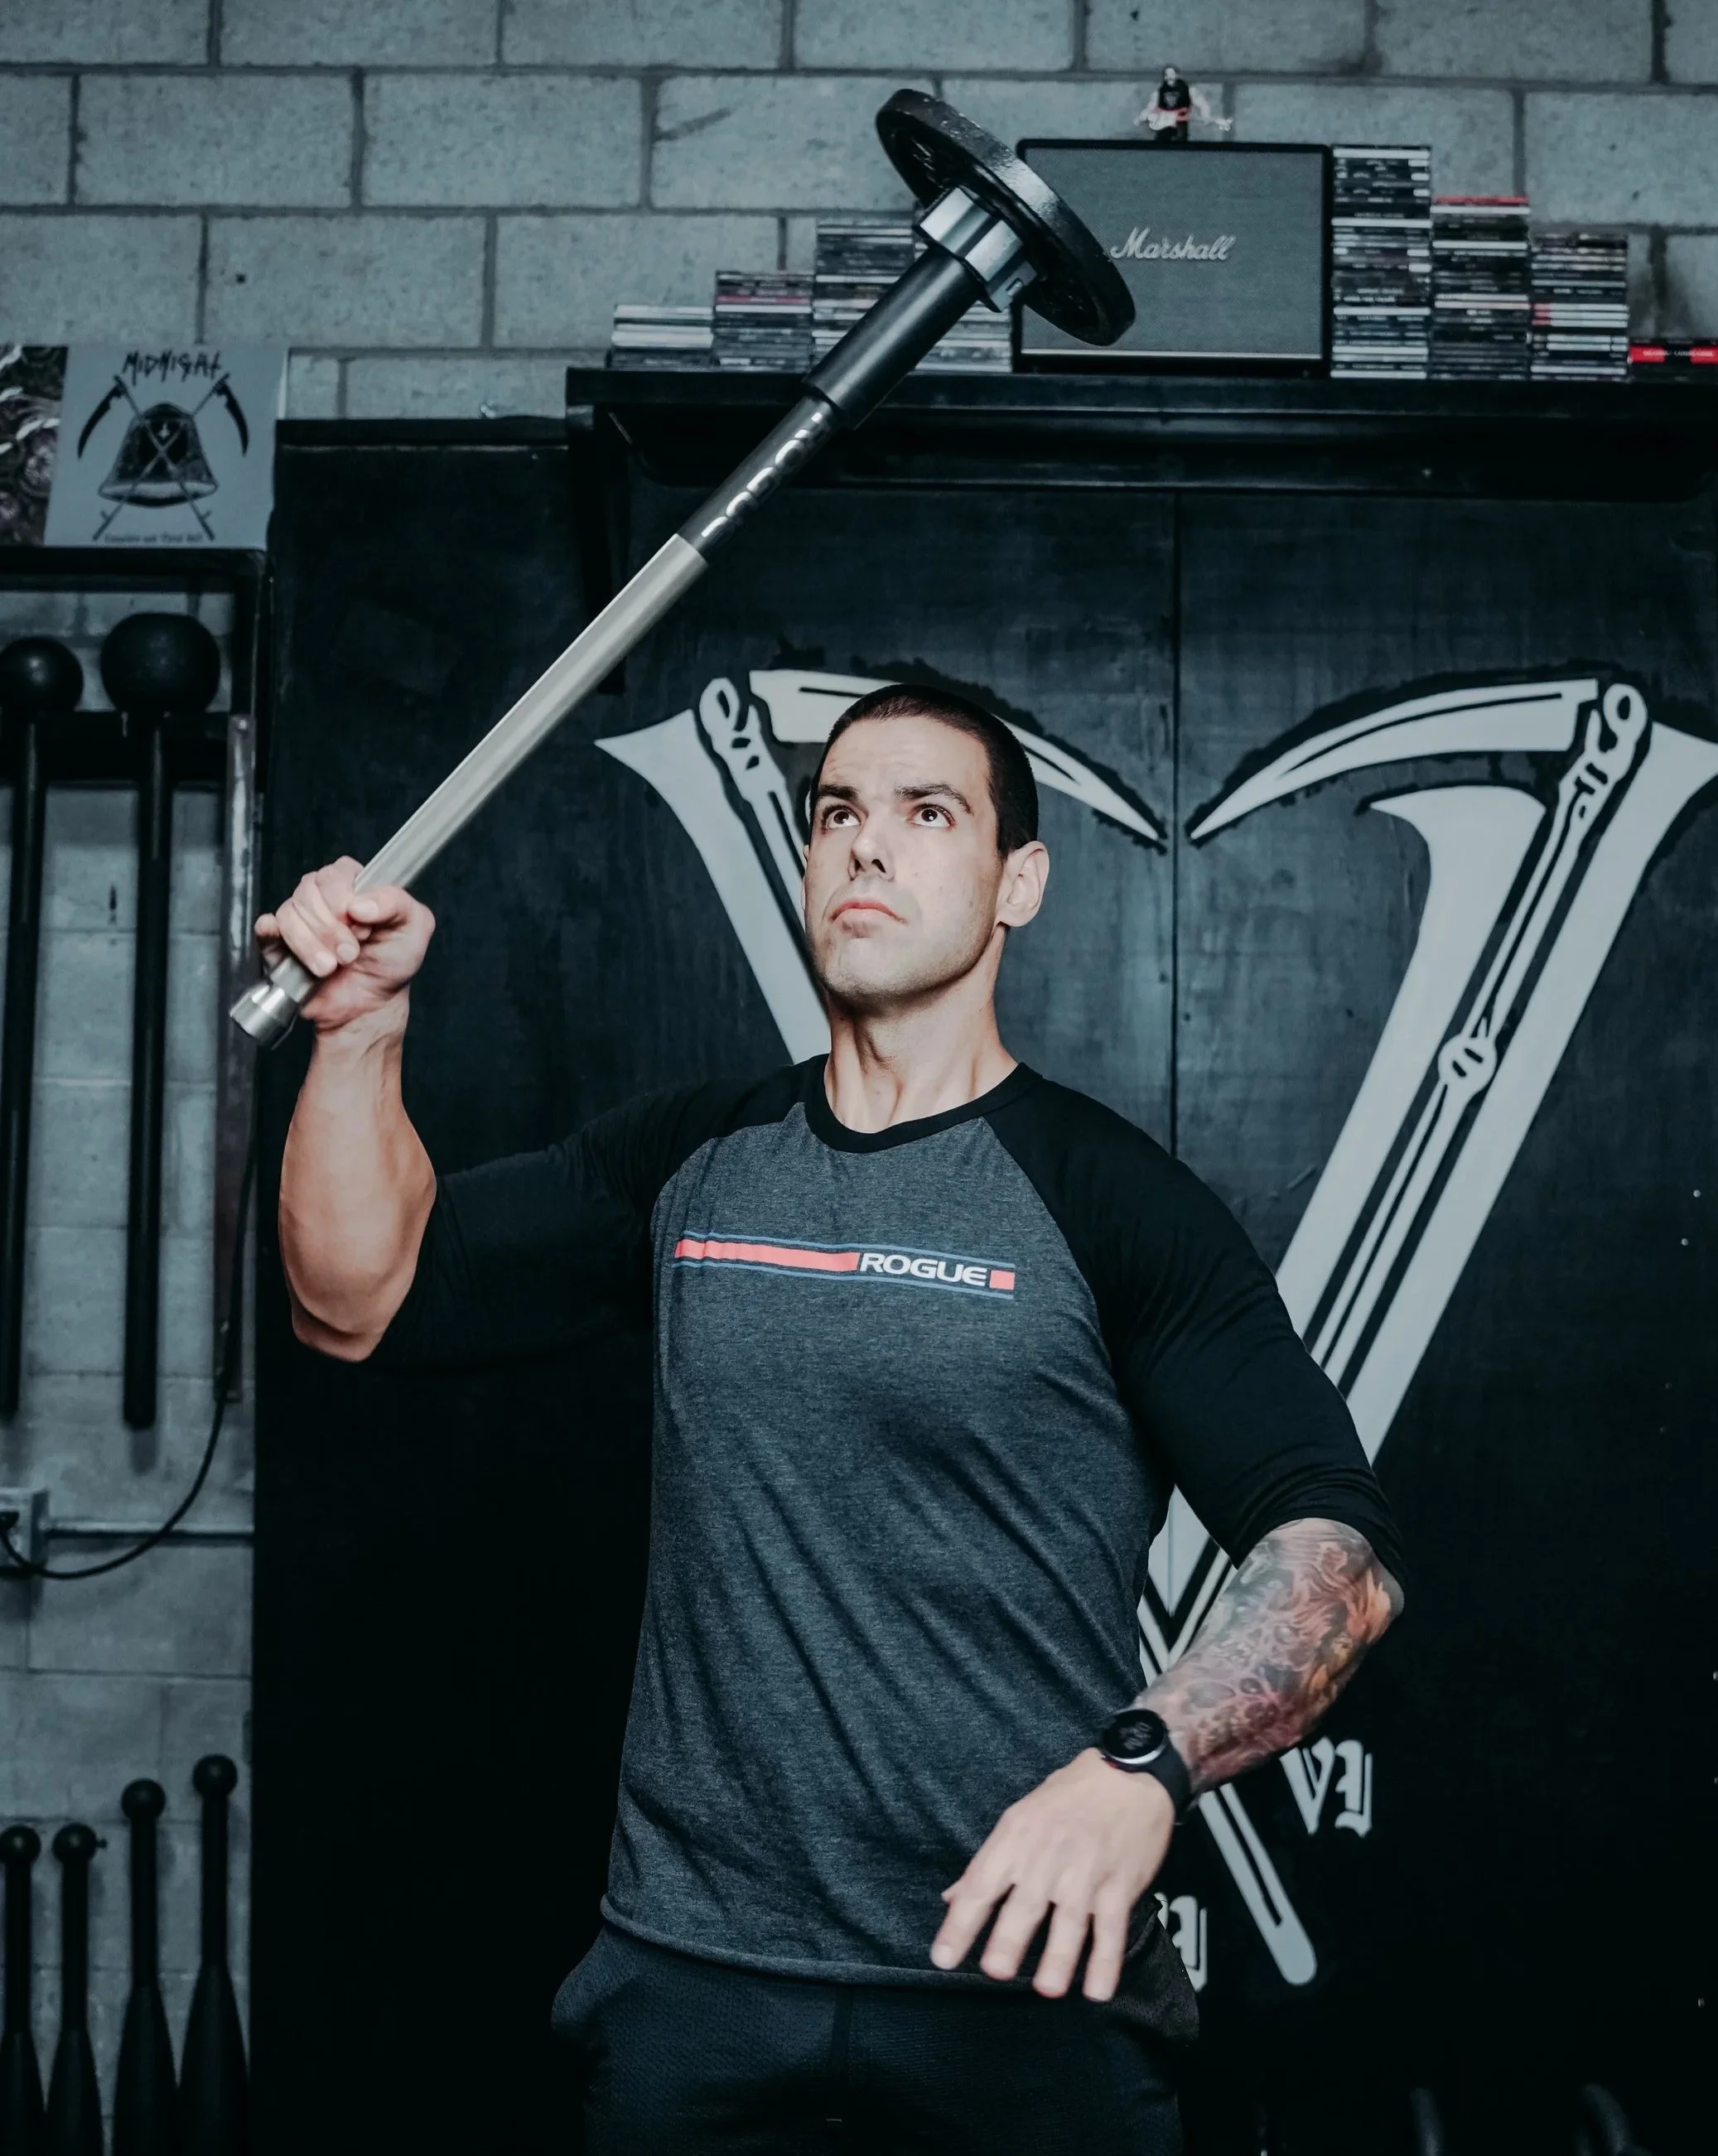
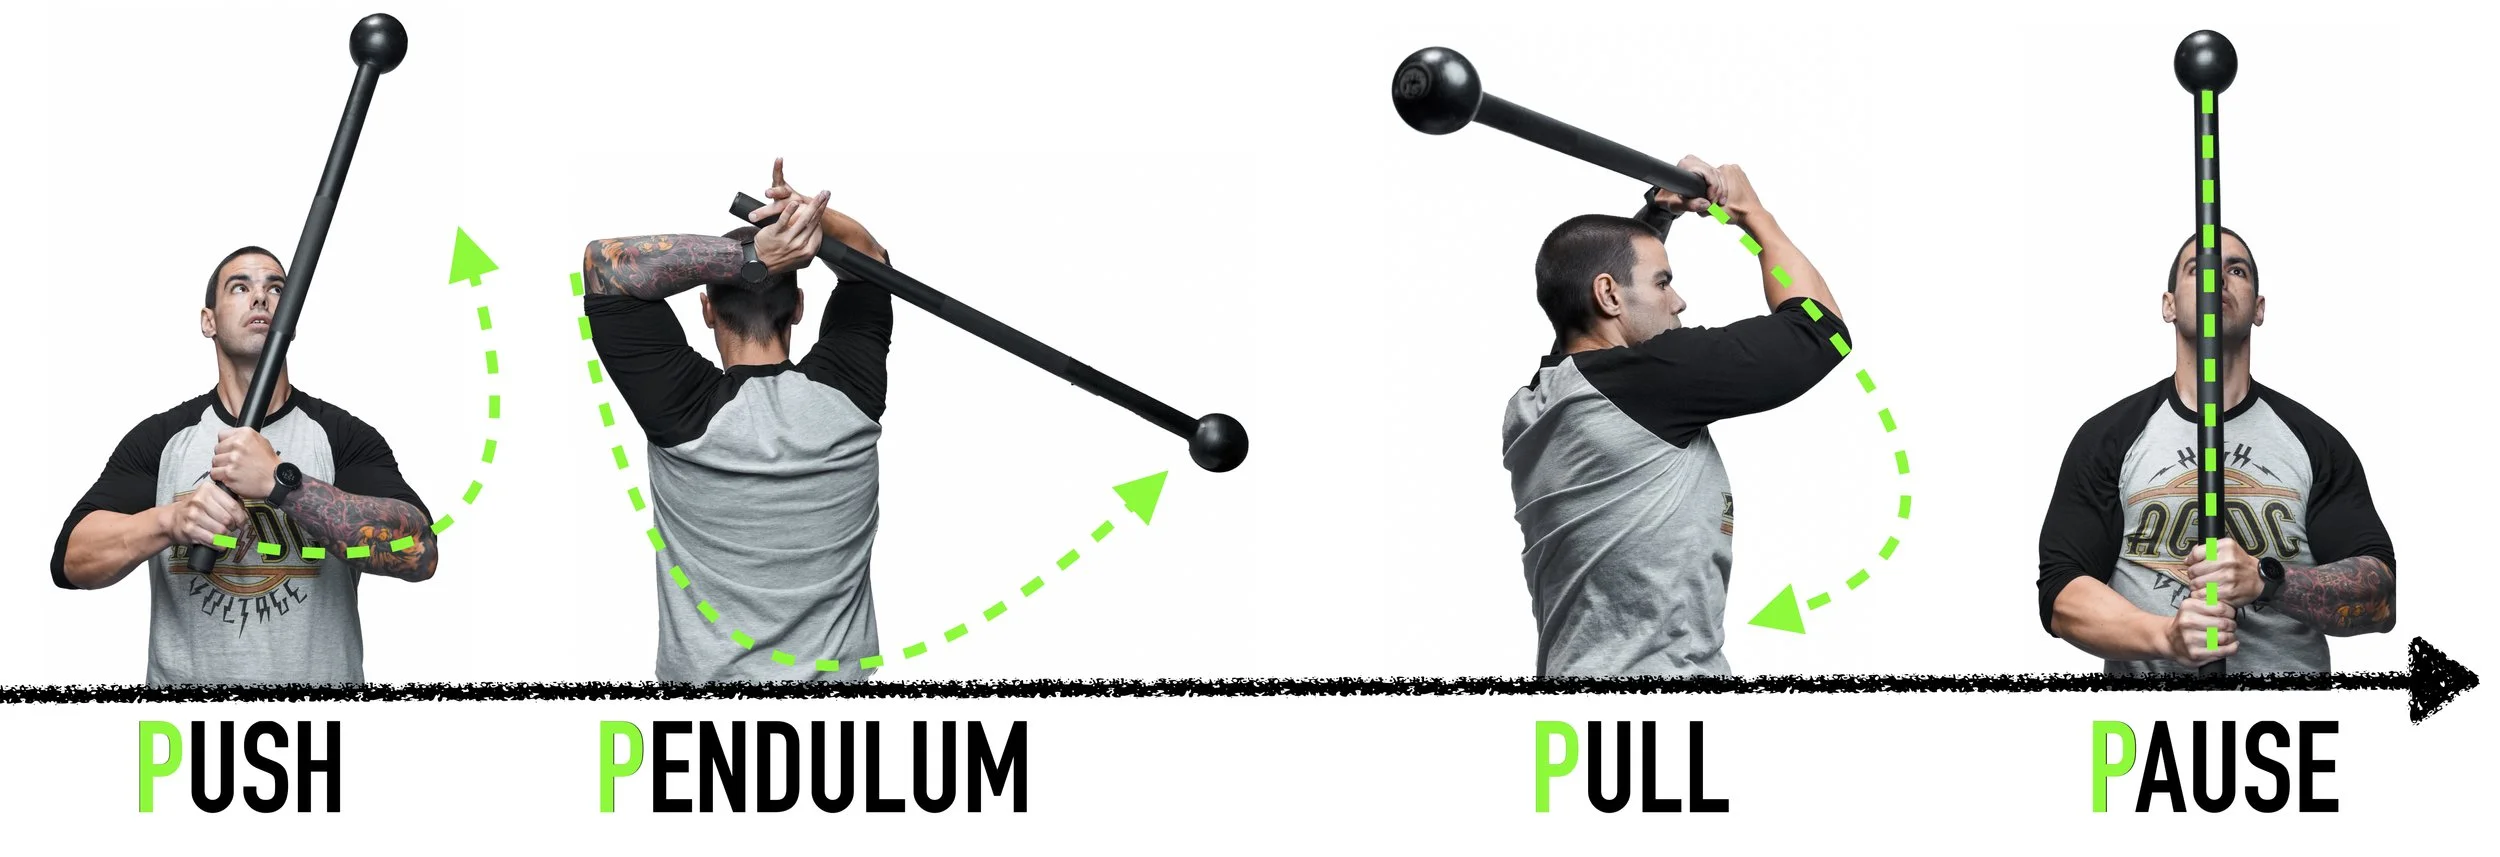
Finally, the Rogue Mace has a bushing design to allow for the loaded weight to rotate freely, and provides a more balanced feel throughout the rotation when swinging the mace. Meaning after each 360, and slightly pausing as its vertically stacked, the momentum of the circular force will go the bushing, and thus rotate the sleeve as the stainless handle remains torque free. This is something I’ve never experienced when swinging any other mace because that rotating sleeve will make you want to slow down, or else it’ll turn into a little tornado. This is actually a good thing because I teach many “The Four P’s” of the steel mace 360 swing: Push, Pendulum, Pull, and Pause. The pause is important so your shoulders can reset and retract back down utilizing the lats (the big muscle wings of the back), and not cause shoulder impingement. I go more in detail with this Rogue Mace Beginner Workout video:
Conclusion:
The Rogue Mace is a innovative tool one should add to their fitness equipment arsenal. This is the first loadable mace out of the dozens I tried I will actually refer. While it may be a dealbreaker for some that the median price for this is $200+ — I firmly believe it is worth it because it will last for a very long time with it’s heavy duty steel construction. When buying any new piece of equipment “buy nice, or buy twice” is the code. Rogue truly out did themselves with every detail of this mace being absolutely flawless.
— CLICK HERE TO GET YOURS
Best Indian Club Exercises For Beginners

Indian clubs are one of those tools that has withstood the test of time, and have been around for thousands of years in India before making it western culture. Great advocators like Dr. Ed Thomas helped promote Indian clubs to become a staple in many’s fitness routines, and became one of the best investments I’ve made in my personal and professional fitness career.

So I put together this two part series on how to get started with your Indian clubs with these exercises best suited for beginners.


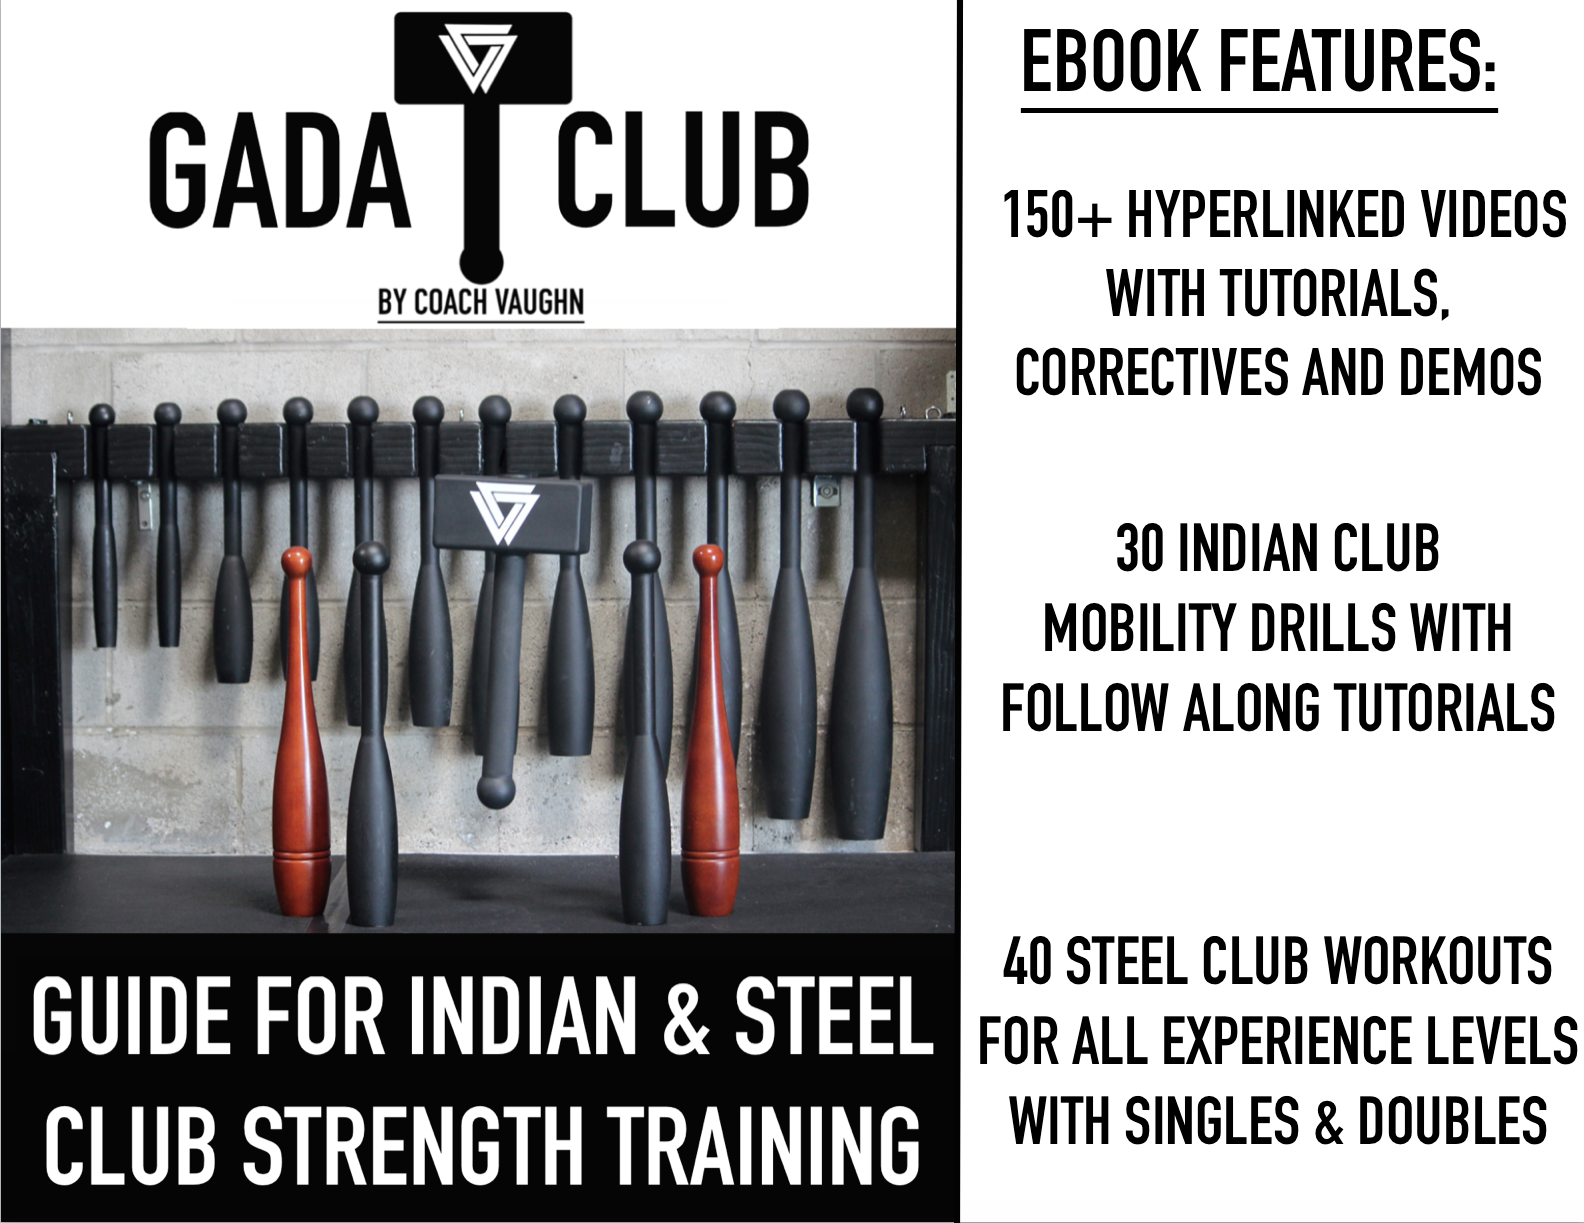
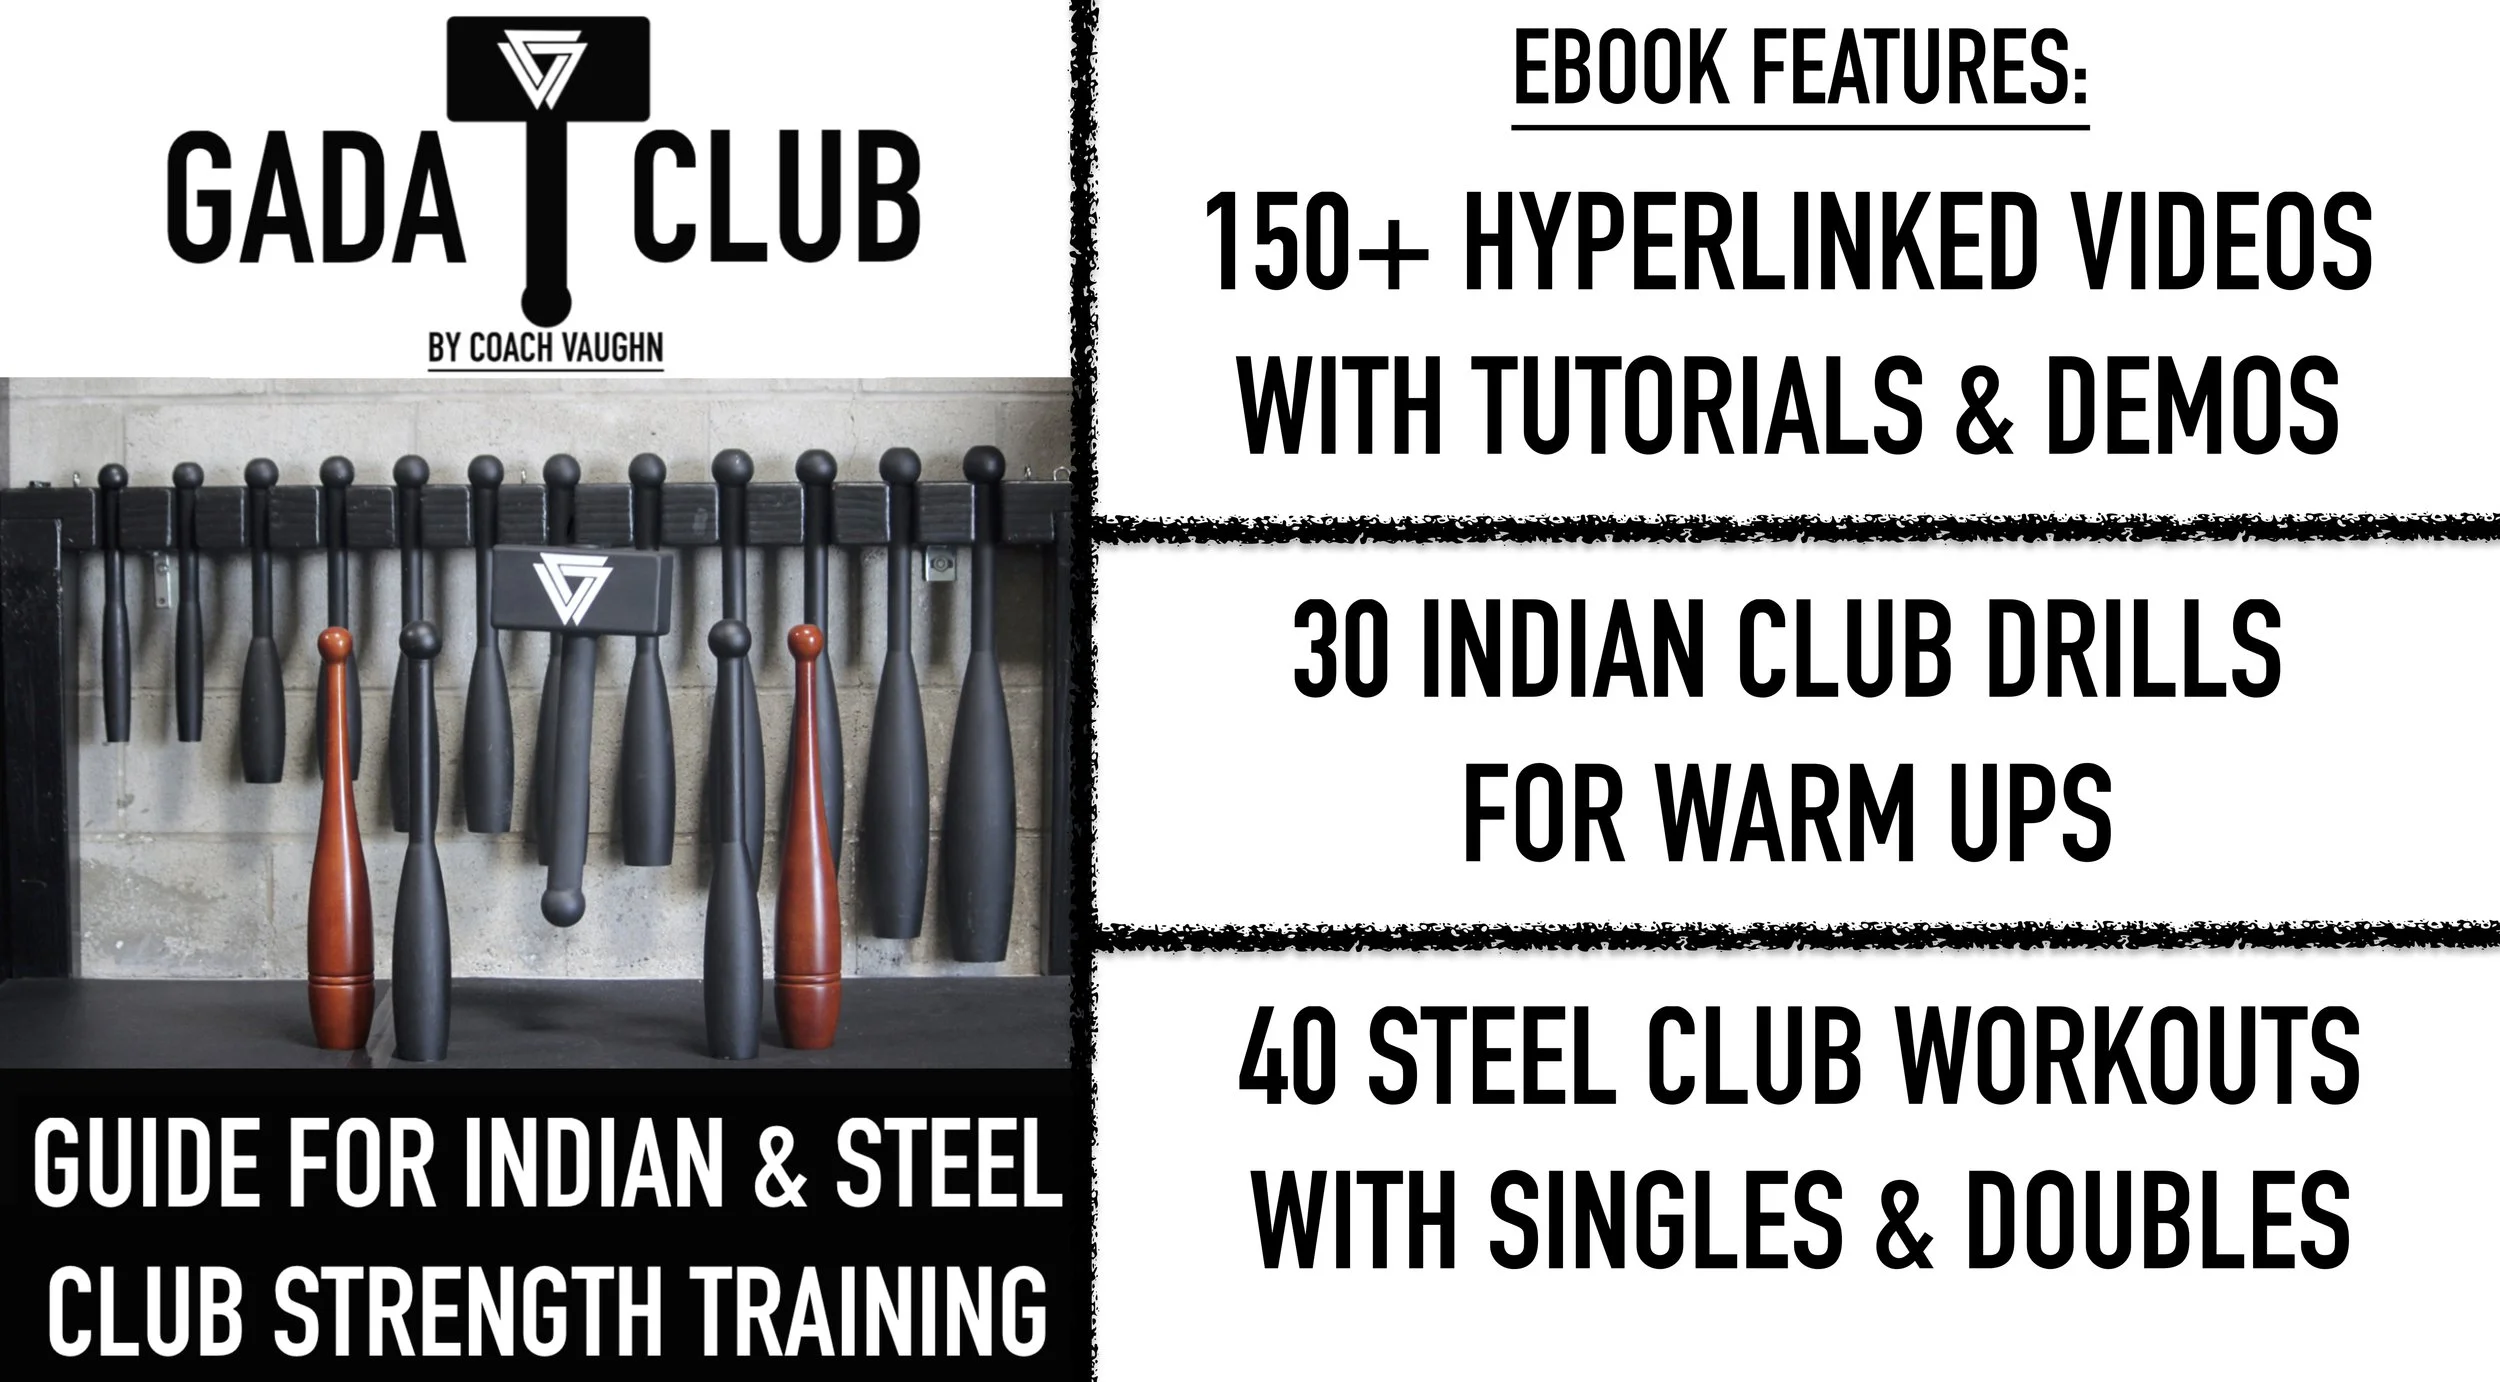
For more Indian Club workouts, be sure to check out my ebook program, GADA Club Guide for Indian & Steel Club Strength Training. Features over 30 indian club warm up drills and 40 workouts steel club workouts (with 150+ exercises with all private hyperlinked video content). Click HERE to download your copy.

Macebell or Clubbell First?

In this new video below, I’ll be answering a very common question in my YouTube comment section:
“Which one should I get first? A Macebell or Clubbell first?”
In summary from the video above - while “get both” is an easy answer — I would never recommend a complete novice to learn how to use both a macebell and clubbell at the same. It really depends on what your goal is (especially if past injuries are currently affecting your current goals). While macebells and clubbells are asymmetrically loaded tools, and have great swing variations — they’re differences matter just as much.
To help you make decision, here are bullet points on the highlights for each
MACEBELL / STEEL MACE:
Great tool for a solid warm up tool before kettlebells or barbells
Helps balance unilateral strength between shoulders with 360 pattern swings
Would NOT recommend if you have serious shoulder and elbow issues
Only a 10lb macebell is needed for beginner women
Only a 15lb macebell is needed for beginner men
CLUBBELL / STEEL CLUB:
Builds dynamic grip strength with it’s elongated shape
Great for building rotational power for baseball, golf, or MMA
Much better option for those with serious shoulder and elbow issues with it being half the length of mace.
Can be worked with singles and doubles (giving more variations than maces)
Only a 10lb Single and 5lb doubles is recommend for women
Only a 15lb Single and 10lb doubles is recommended for men
If you’d like to know more, I have more articles with free workouts featured below on both these tools for beginners:
I also have plenty of ebooks programs showing how to safely integrate these tools together. You can save 20% off on single ebooks with code VVV20 at checkout or bundle them saving over 40% off

Why Indian Clubs?

Being a fitness coach for over 15 years — I’ve pretty much seen it all with equipment trends over each decade. Many tools gain popularity, but rarely stand the test of time. In my opinion, if you can’t explain the “why” behind the tool . . . then there’s no real philosophy behind it.
However, Indian clubs are one of those tools that has withstood the test of time, and have been around for thousands of years in India before making it western culture. Great advocators like Dr. Ed Thomas helped promote Indian clubs to become a staple in many’s fitness routines, and became one of the best investments I’ve made in my personal and professional fitness career. So in this video below, I explain why Indian Clubs should become apart of your arsenal if you want to make fitness a long-term plan.
Learning to deal with a separated shoulder was a defining moment in my fitness career because it taught me how the body functions in response to stress and injury. One of the scariest moments (months after the injury) was when I just finished a heavy dumbbell pressing workout and felt as if my entire right side was shutting down. While it wasn’t a stroke, a nerve was getting impinged in my shoulder and causing serious numbness. After that day, I decided not to lift any heavy loads until I had fixed my problem. I refused surgery because I knew too many people who ended up worse after becoming addicted to medication to deal with the constant pain.
So when I found indian clubs to input into my new routine — I got great results being able to press heavy again without any pain or numbness. Now, I’m not stating by any measure Indian Clubs “cure” shoulder pain — it took months of patience of learning HOW to use this tool with a consistent routine. Dr. Perry Nickelston (Stop Chasing Pain) asks: “What do ALL injuries have in common? You don’t move the same after.”
So as referenced in the “Why Indian Clubs” video above. Here is the Beginner Indian Club Metronome Mill Workout to show you how to utilize them with control, speed, and dexterity. You can download the metronome app here for free when utilizing the BPM:
These indian club drills have been a part of my warm up routine for years. They can help rid a lot stiffness in the body and shoulder pain from poor posture patterns. As we get older, we must gain new knowledge to combat these tough lessons in life.
For more Indian Club workouts, be sure to check out my ebook program, GADA Club Guide for Indian & Steel Club Strength Training. Features over 30 indian club warm up drills and 40 workouts steel club workouts (with 150+ exercises with all private hyperlinked video content). Click HERE to download your copy.
Beginner Guide to Macebells
The macebell is an unconventional tool to help build grip strength, shoulder resiliency, and can give one hell of a total body workout. The problem is when most get them in the mail finally…they have no idea what do with a macebell workout wise. Luckily, I‘ve put together a lot of beginner macebell workout videos over the years to help guide you in the right direction toward moving better and stronger with your mace.

The workouts below will help build your skills with your macebell at safe pace. For beginners, I recommend men go heavier than 15lb macebell and women go with a 10lb macebell (click to view Onnit Steel Maces). While it may seem like much weight . . .trust when I say the macebell will put you in your place when performing these strength building exercises. Each video below progresses from beginner, intermediate, and advanced levels with your macebell.


Hope you enjoyied this Beginner Macebell Guide, and if you’d like to see more macebell exercises like these — check out my book, Enter The Steel Mace, now available on Amazon. It features hundreds of HD photos like the ones above, and a full beginner program that can be downloaded through a QR code.

Beginner Guide to Clubbells

If you’re getting into clubbells (or steel clubs), you may a bit lost on where to start on how this tool can be implemented into your workouts. Typically, most are aware of kettlebells and steel maces when curious about clubbellls (that’s personally, how I got into them in 2016). However, just in case you are unaware — what all these tools have in common (pictured below), it is their center of mass is distal from the handle (being asymmetrically loaded). Making them perfect for ballistic athletic movements like swings, cleans, 360s, and snatches.

I’ve become well experienced with all these tools for almost a decade, and can tell you with confidence out of all three . . . clubbells are the most challenging because they combine the best of both worlds from steel maces and kettlebells. Steel maces are critically known to have a very long handle (far left), and kettlebells have a very short rounded handle (middle). This is where clubs are in the middle ground being distally loaded between the two (being not too long, and not too short).
Beginner Clubbell Weight Recommendations:
So with all this in mind, it’s important a beginner knows where to start weight wise. Many think getting a 20LB+ clubbell will be a good start, and this will not only be a waste of money, but will risk injury. Trust me when I say, clubbells WILL strike down any ego you may have thinking how strong you are (even if you have kettlebell experience). So please take the listed recommendations below from someone who has not only used them for years, but has coached many one on one when first beginning with clubbells:

What’s great about clubbells is we can work with two, and single handed positions with a single. Then advance the foundational clubbell movements with doubles. I personally use Onnit Steel Clubs at my gym, and in my YouTube video tutorials.
How do I workout with Clubbells?
Luckily, my YouTube channel is well known for clubbell (or steel club) workout tutorials since 2016, and have recently updated a new series for 2024. Below are three workouts that evolve from beginner, intermediate, and advanced so you can get the most out your clubbells with both singles & double variations. All the repetitions and sets are listed after each following video tutorial below:


So if you liked what you read and want to progress your skills with clubbells — checkout my ebook program GADA Club: Guide for Indian & Steel Club Strength Training on sale now and can be purchased HERE. It features 30 different indian club warm up drills before you get into the strength training with your 40 steel club workouts. If you’d like to know more about indian clubs, I also wrote another article on them HERE. I hope I gave you a better understanding about steel clubs and what they can offer for your fitness regimen.
USE CODE: GOINGCLUBBING10
Steel Mace HEAVY 360 Ladder Workouts
Most when getting into steel mace training, are addicted to 360s . . . me included. I’ve been swinging this tool since 2014, and still love getting in a workout with my heavier maces 2-3 times a week. It’s hands down one of my favorite unconventional tools to get stronger with — so much so I can swing a 25kg / 55LB steel mace with ease for reps now. Inevitably, the question came up often among my subscribers, “how do you build strength toward swinging a heavier steel mace?”
My methods toward building strength with heavier steel maces is simple . . . however many confuse that word with easy. A big part of the system is keeping the reps minimal with optimal rest times (usually 1-2 minutes after both directions or sides). I’m not a fan of going as heavy as possible, with as many reps as possible, with zero rest times — it’s complete recipe for injury with any tool.
Secondly, you need at least 3-4 different steel mace weights (if you have more that’s even better). This is so you treat each mace as a rung to make a ladder going up and back down in weight. As you will see in the Steel Mace HEAVY 360 Ladder Workouts below, we will not only being doing two handed (2H) 360s (Part 1), but single arm (1H) variations to get your grip strength even stronger (Part 2).


If you want to see an in-depth review of all the heavier steel mace brands I own and use for these workouts — you can check them out here featured in the video below:
Onnit Quad Mace - 25LB
Wolf Brigade Mace - 35LB
Apollo Steel Mace - 40LB
Agastu Steel Mace - 55LB (No longer in production)
White Lion Steel Mace -70LB
Hope you enjoy these workouts, and if you’d like to see more steel mace exercises like these — check out my book, Enter The Steel Mace, now available on Amazon. It features hundreds of HD photos like the ones above, and a full beginner program that can be downloaded through a QR code.
Steel Club Training FAQ
While steel clubs are making gains in popularity in people’s garage gyms and workout programs — they’re still many questions to the common outsider seeing these for the time and as well for the beginner who feels lost when working out with them.
Steel Club 2H Deadstop Side Swings
So I put together this “Why Steel Clubs?” video to better educate those curious about this tool and why it’s worth investing.
If you’d like to see more and have a better guide to show how to use steel clubs with a full workout program — check my ebook, GADA Club: Guide For Indian & Steel Club Strength Training here on the site. It features educational chapters with video tutorials breaking down the all steel club foundations for BOTH singles and doubles. Then the workout program is broken into beginner, intermediate, and advanced levels (with 12 workouts in each level). Every exercise is hyperlinked so know exactly what do with confidence and strength with your indian and steel clubs. To save at checkout, use code: GOINGCLUBBING10
Steel Mace Fighter Workout
What I love about the steel mace is it’s scalability. I can use it to train a basic beginner wanting to simply move better or I can give a hell of workout with it for a high endurance athlete. In this case for this article, a fighter in boxing, MMA, Jiu Jitsu, and many other forms of marital arts can highly benefit to adding in steel maces to their workout routine. Maintaining a high level of focus to defend and striking quick with power usually what it always boils down to with fighter athletes. So the steel mace’s asymmetrical load can be put into high use with uppercut, ground & pound, and ballistic hip hinge swing patterns to build on that power.

First, lets breakdown all three exercises in this Steel Mace Fighter Workout video:

Steel Mace Uppercuts:

Steel Mace Ground & Pound:

Steel Mace Rotational H2H Swing & Catch:

Hope you enjoy this workout, and if you’d like to see more steel mace exercises like these — check out my book, Enter The Steel Mace, now available on Amazon. It features hundreds of HD photos like the ones above, and a full beginner program that can be downloaded through a QR code.
Differences Between Indian & Steel Clubs
Clubs are finally starting to become more mainstream in the strength world. However, many are confusing Indian and Steel clubs . . . as the same thing? One is built for speed and the other is meant for raw grip strength. Watch this video breaking down the differences between the two:
As soon as I posted this video, I knew I was going to get inevitably bashed by Club Traditionalist linking videos of their origin (which is exactly what happened). I’m very aware of Traditional Indian Club Training methods with larger clubs/gadas in all shapes & sizes. This video explains the MODERN use of light Indian & heavy steel clubs for those in western culture who have no idea how or even what clubs are because it's not a common tool in the west. Hence, why I constantly reference American sports like baseball & football in this video to help relate the common movement patterns with them.
Modern steel & wooden clubs of this sort are getting popular because they can be shipped easier with less cost. Very few will spend the money to ship out (or even make) a giant wooden sized Gada, Jori, Karela, or Meel from another country (let alone make space or train someone with it). So if you want to train traditional...do so (and I'm not saying it's wrong by any degree). However, this is how clubs are becoming modernized in the west thanks to researchers like Dr. Ed Thomas and Gray Cook (FMS).
If you’d like to know more about Indian & Steel Clubs — I have more articles linked below:
Then if you want more guidance how to integrate BOTH — be sure to checkout my ebook, GADA Club: Guide For Indian & Steel Club Strength Training. Has a full amount of in-depth coaching tutorials in each chapter and beginner, intermediate, and advanced program workouts all featured in one source. Be sure to sure to use code: GOINGCLUBBING10 at check out to save HERE:

Mastering The Four P's For Steel Mace 360s
With the popularity of garage gyms becoming apart of the new normal it’s no surprise steel mace training are interesting more people to a popular level. The steel mace is a simple tool, but that doesn’t mean you should confuse simple with easy. The steel mace gives you instant feedback and this is what throws off many because they didn’t expect 10-15lb weight to be challenging. This reigns true especially when trying 360s for the first time because that supposed “little weight” accelerates into the pendulum and now feel feels 5x heavier. While this exercise is great for grip strength, shoulder resilience, and keeping your posture strong . . . it will do damage if you don’t have any guidance.

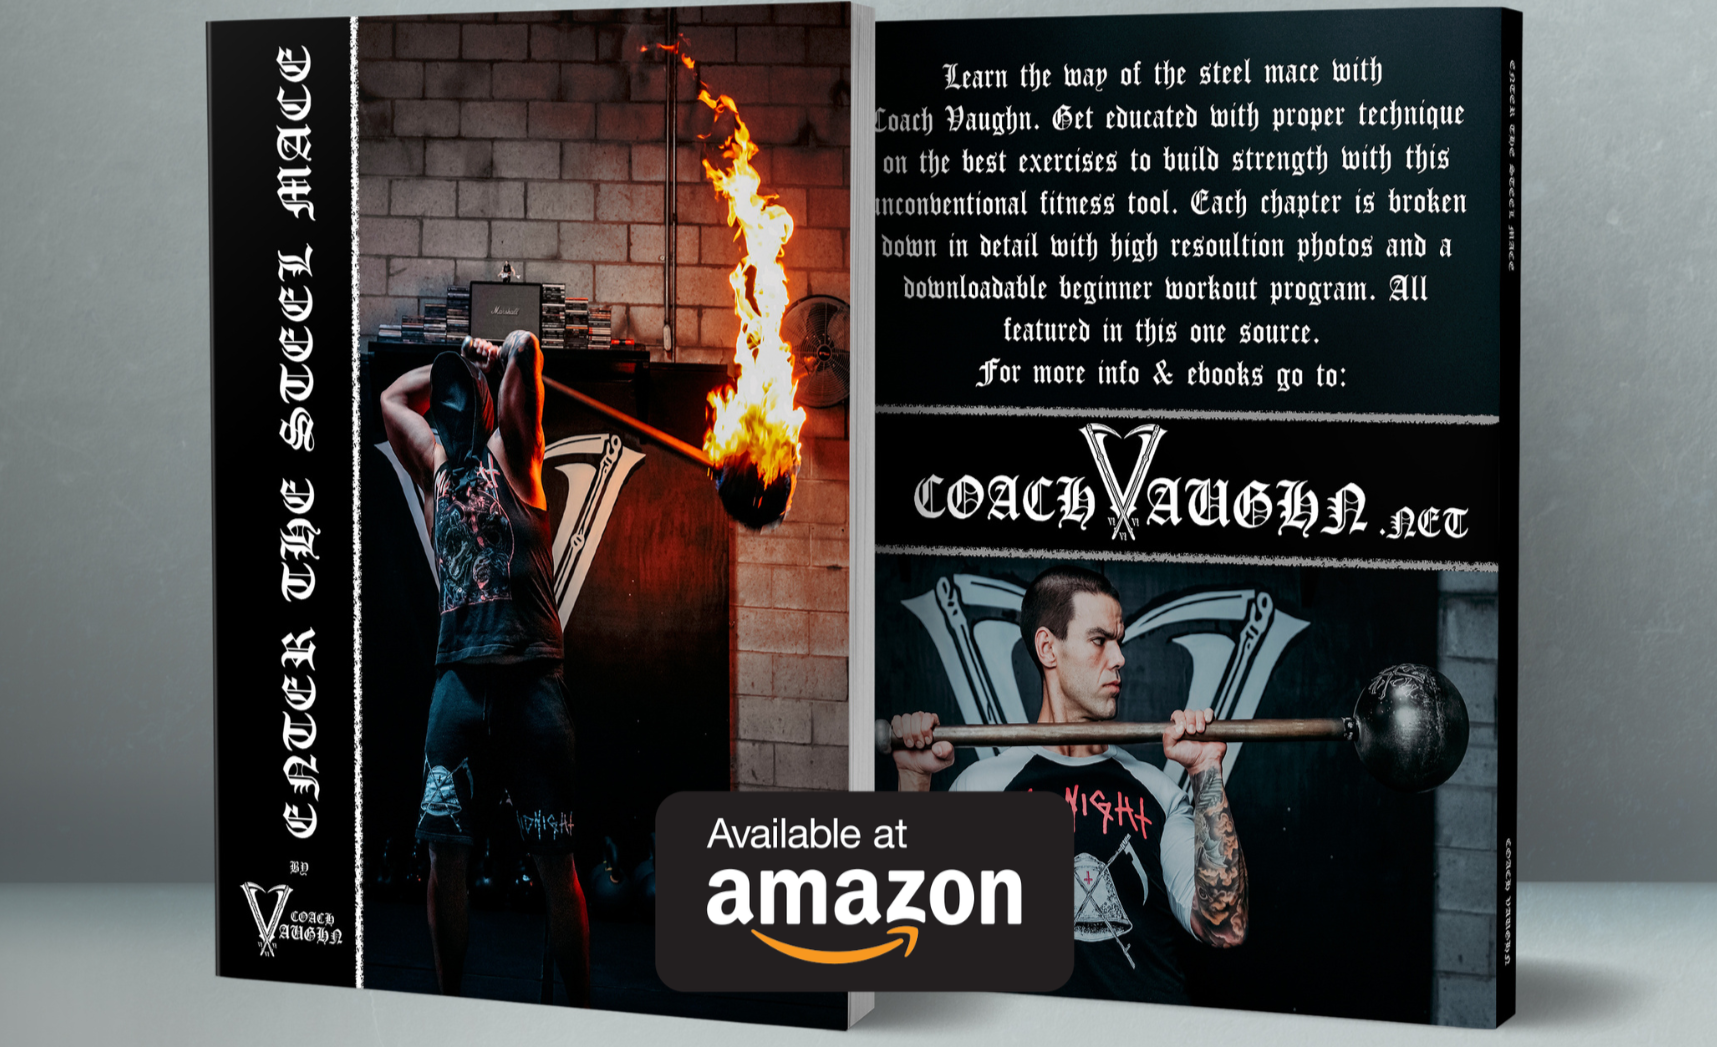
So after years of coaching steel mace 360s to others I came up with a mental cue system to make each rep of pure quality and call them the Four P’s of The Steel Mace 360s: Push, Pendulum, Pull, and Pause. Every one of these positions has something that can be worked on to enforce proper strength techniques. All too often I see many online rushing 360s to the point they look robotic (when it’s meant to be smooth and fluid). I believe in this coaching concept so much I made it into an entire chapter in my new book, Enter The Steel Mace: Beginner Guide For Steel Mace Training. So the high definition photos you’re seeing breaking down these four phases are one of hundreds featured in this book that go beyond two handed 360s.
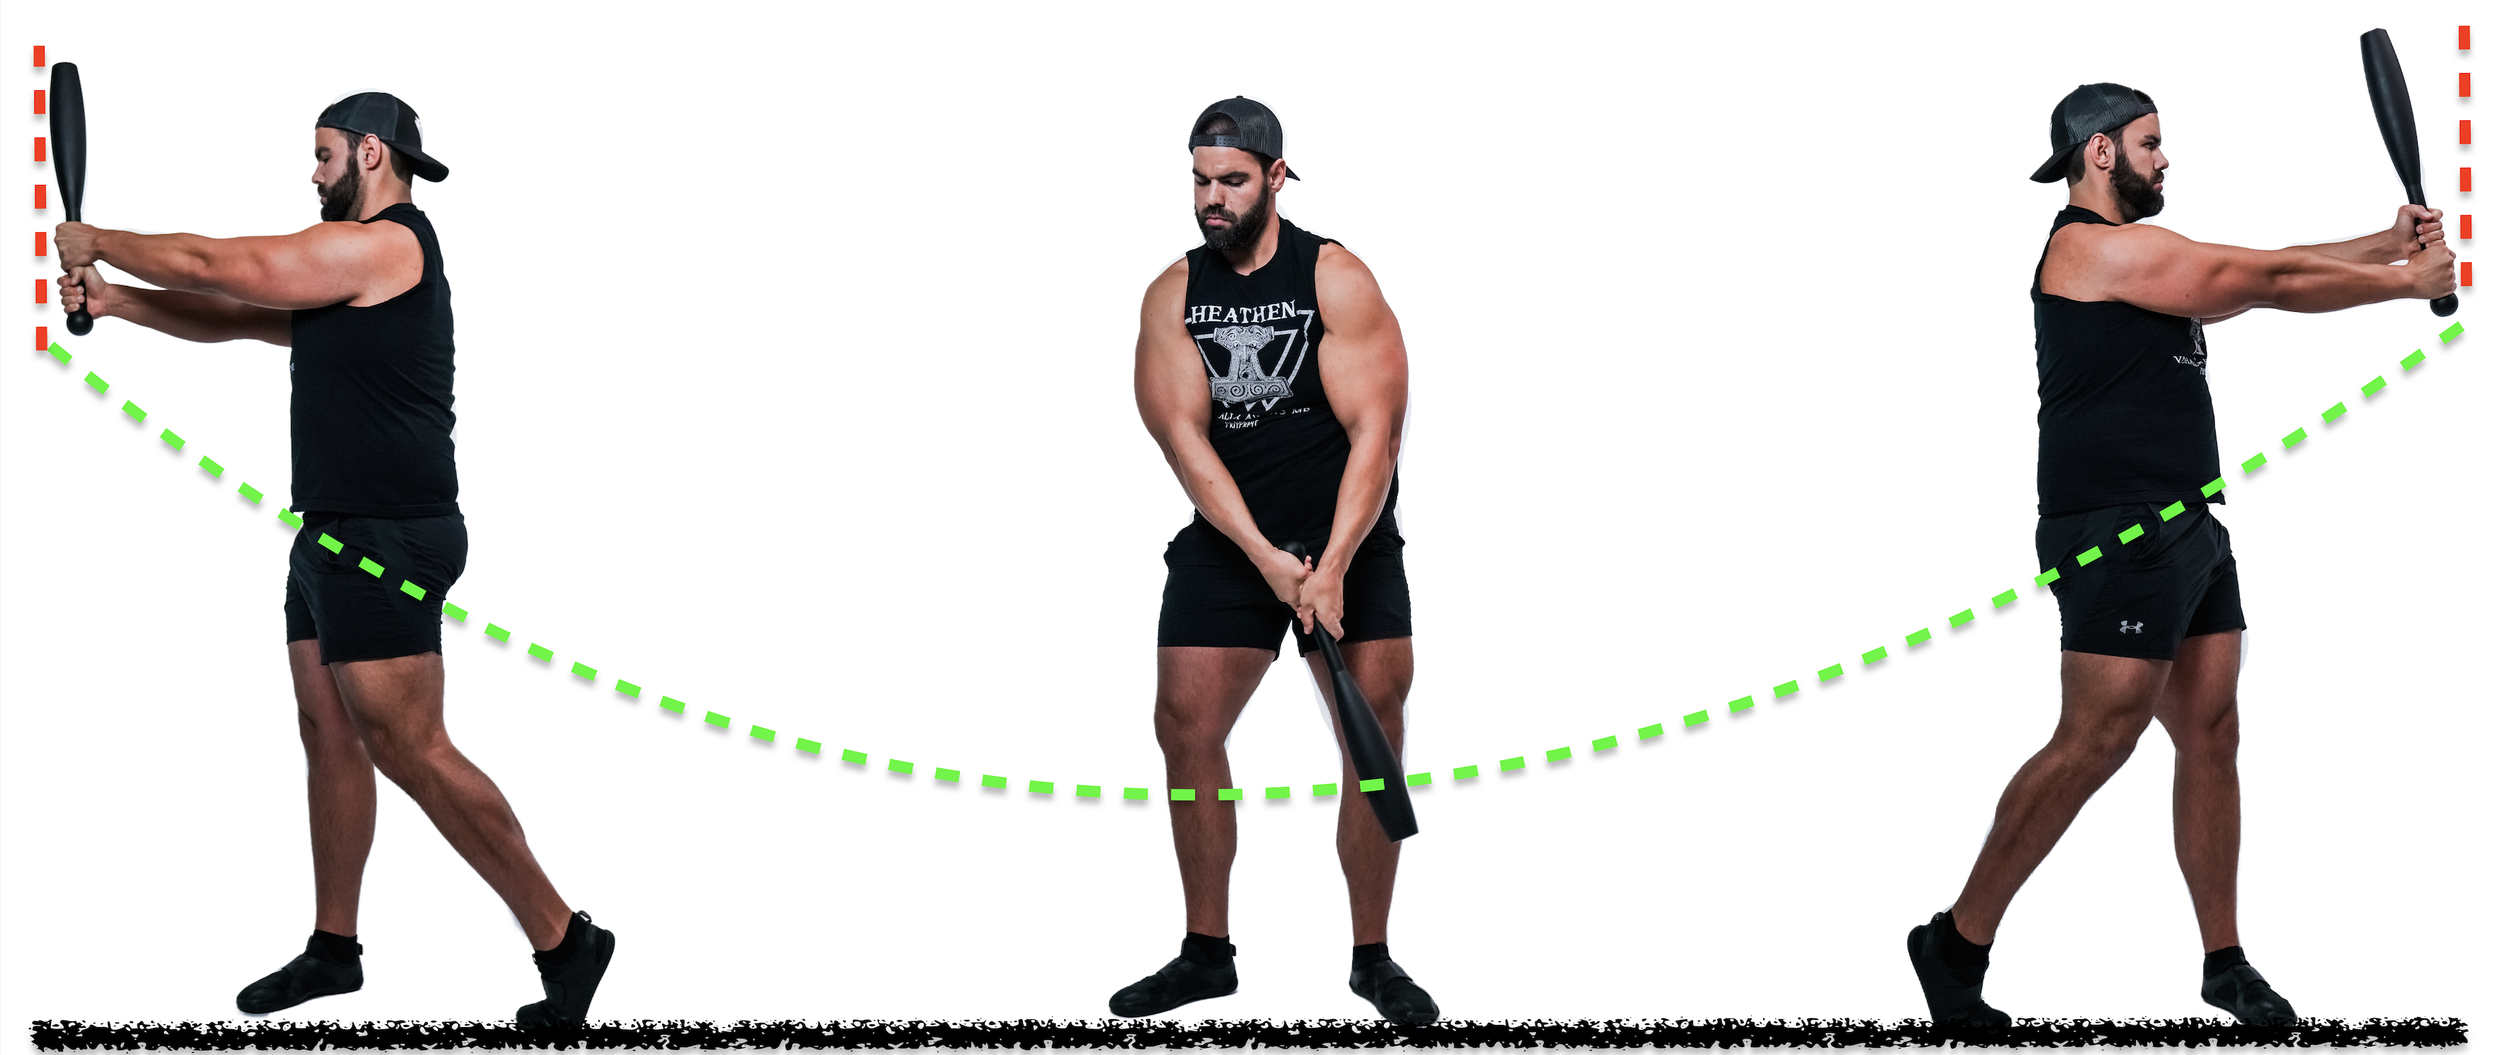
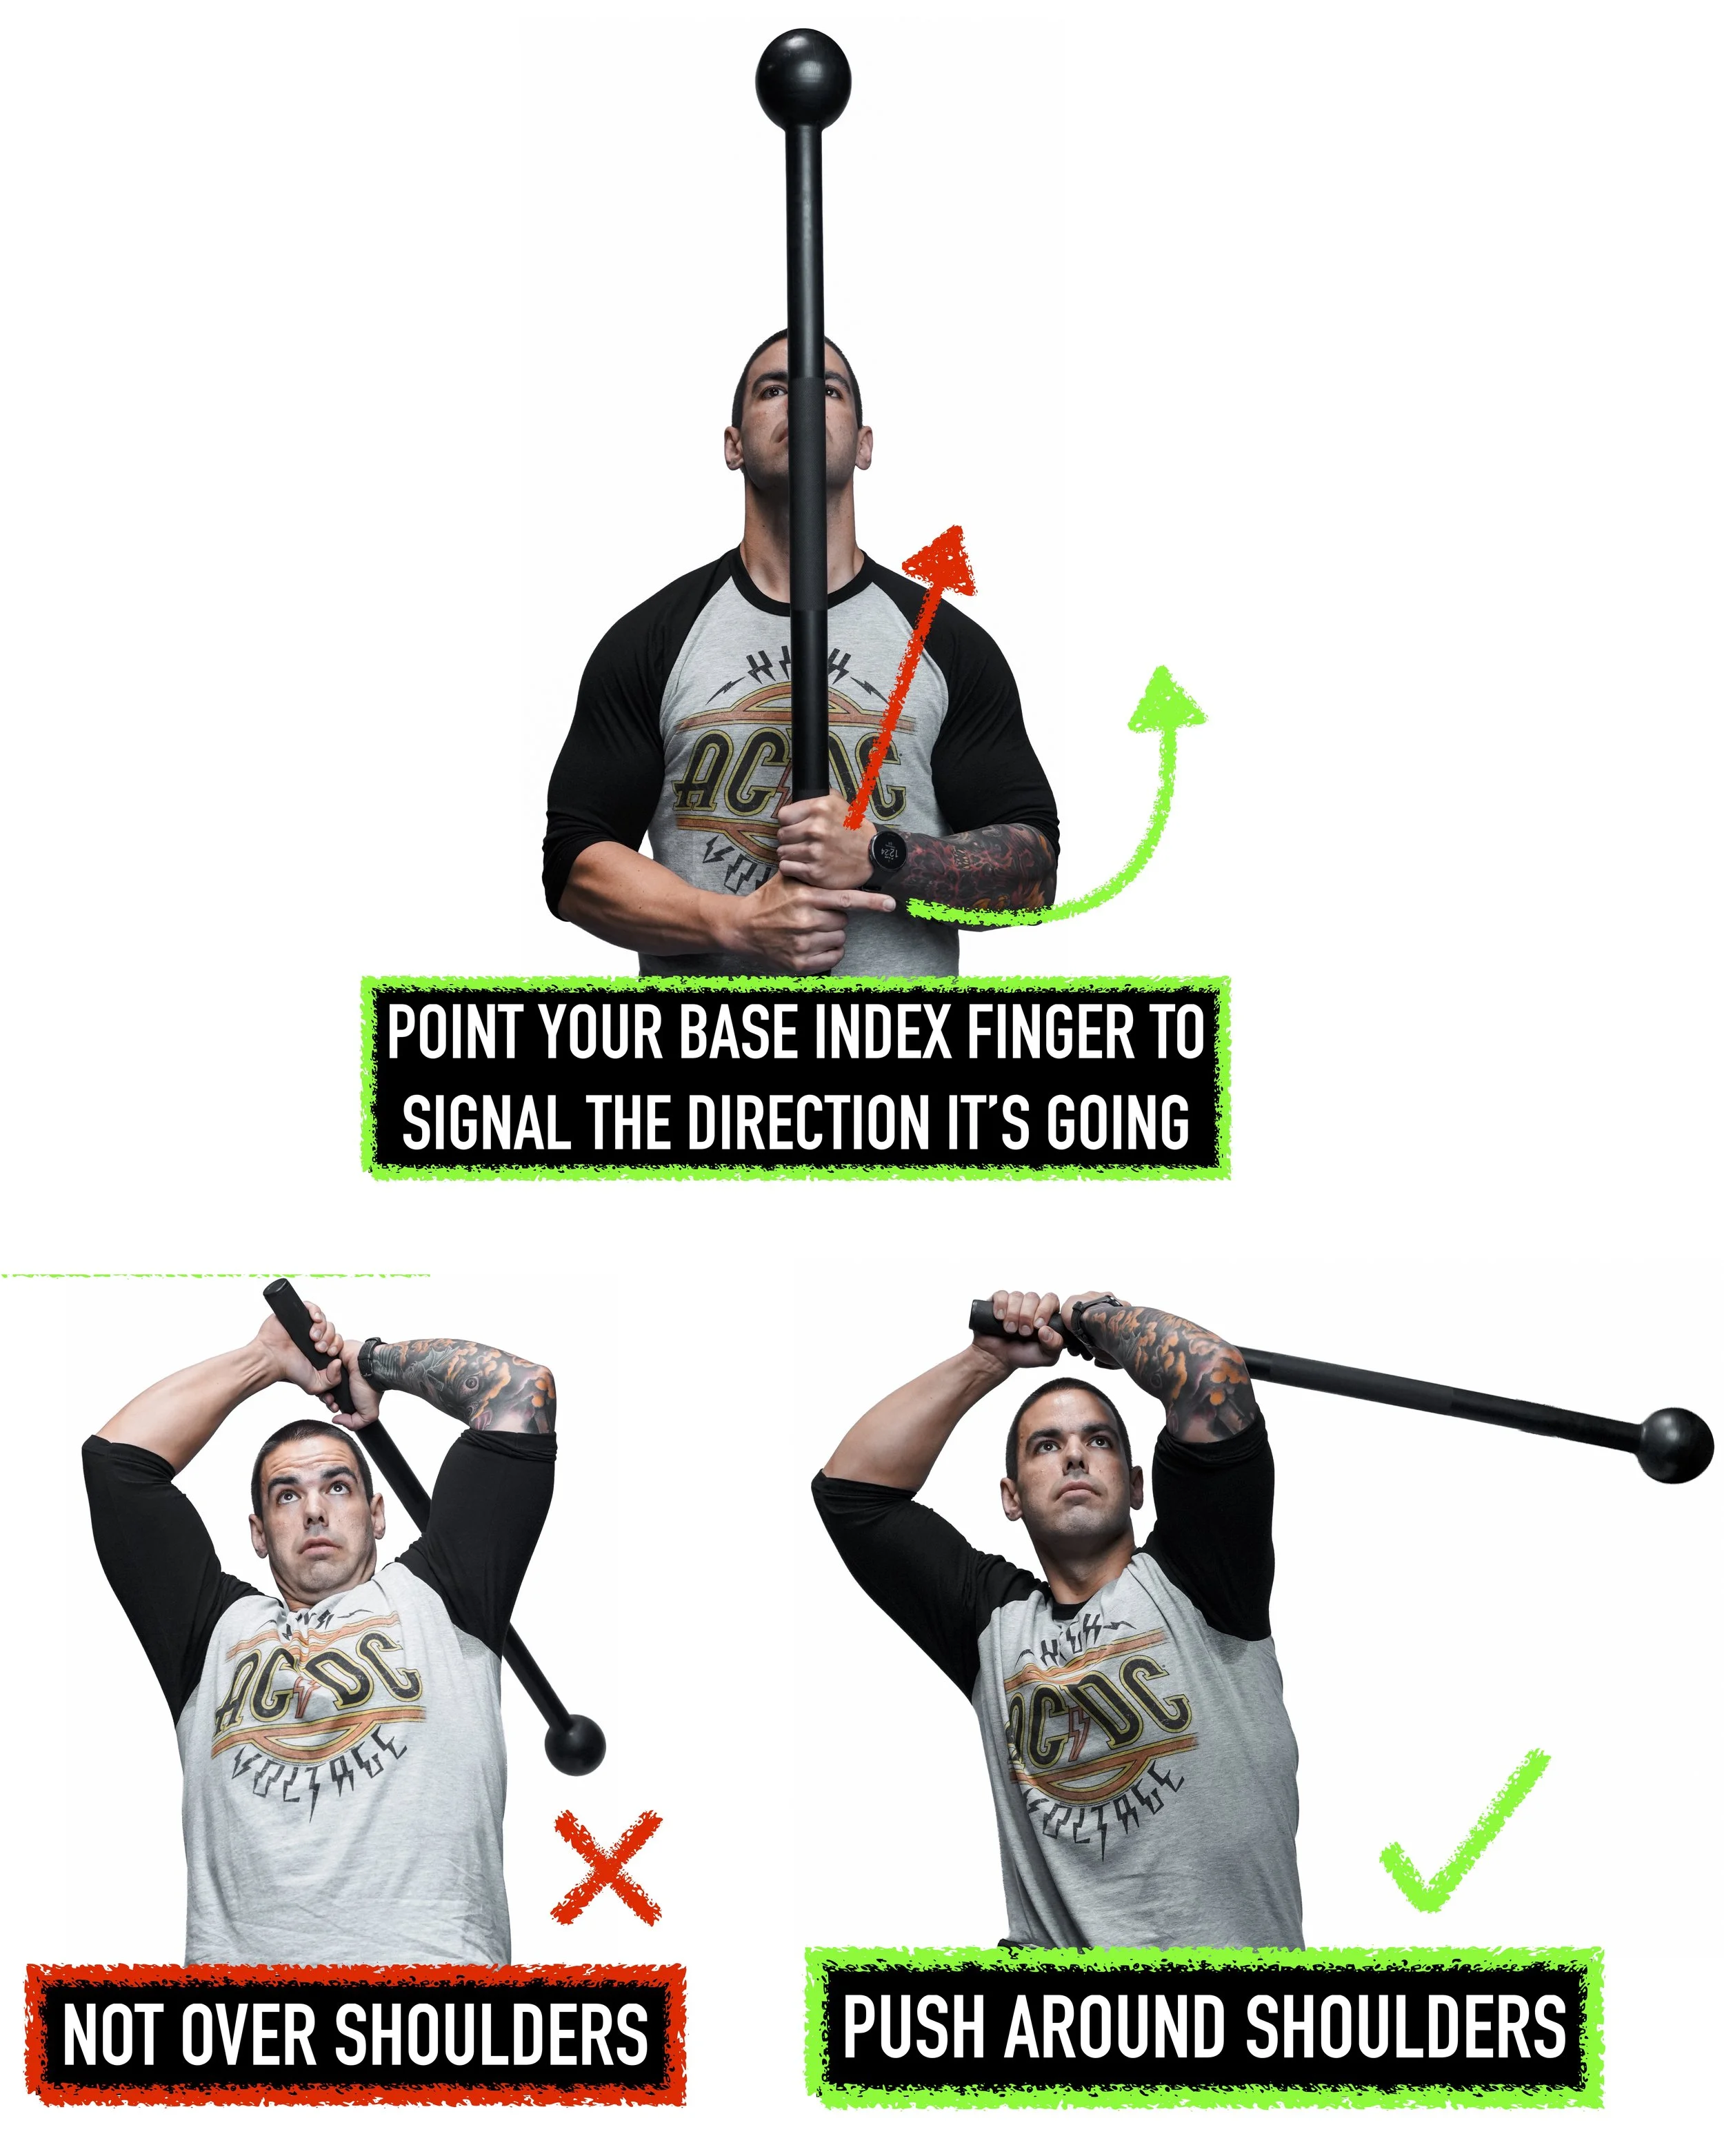
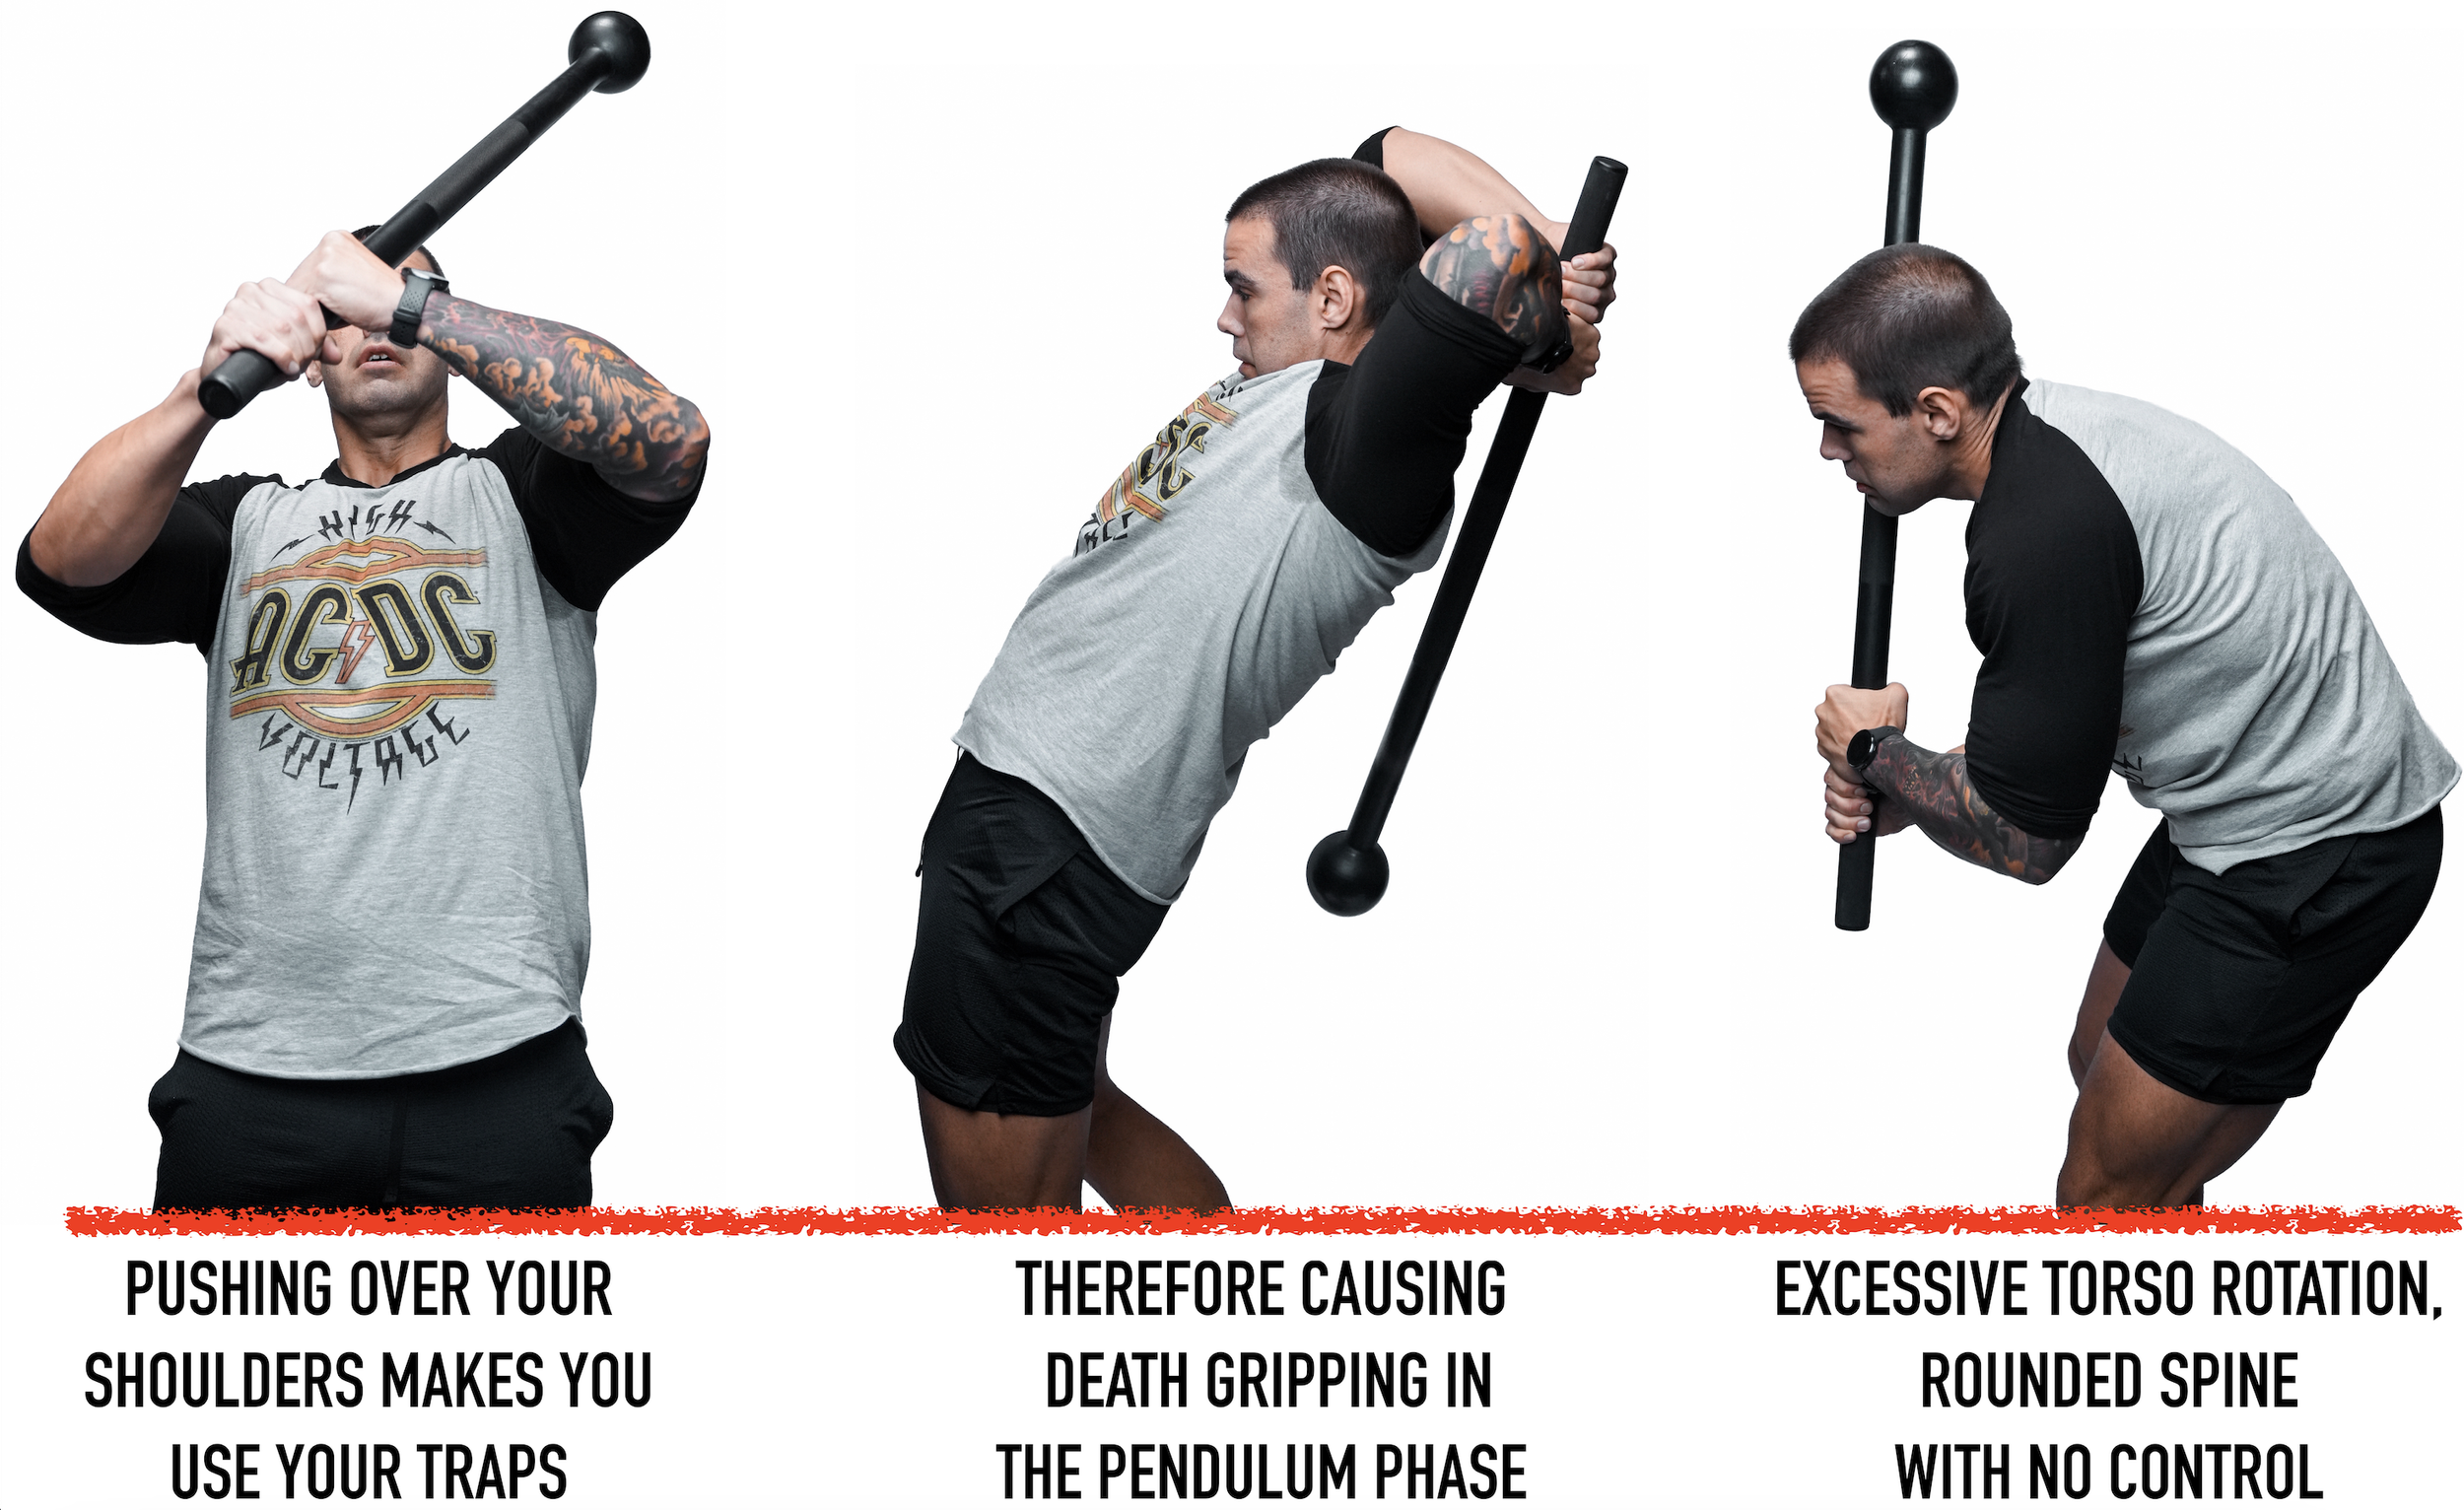
PUSH: Set up in the vertical stack position and point with the base hand signaling the direction you’re going in. From here you want to push the mace AROUND your shoulders to set up the pendulum phase. Pushing it over the shoulders enforces you to shrug and lose space in your neck.
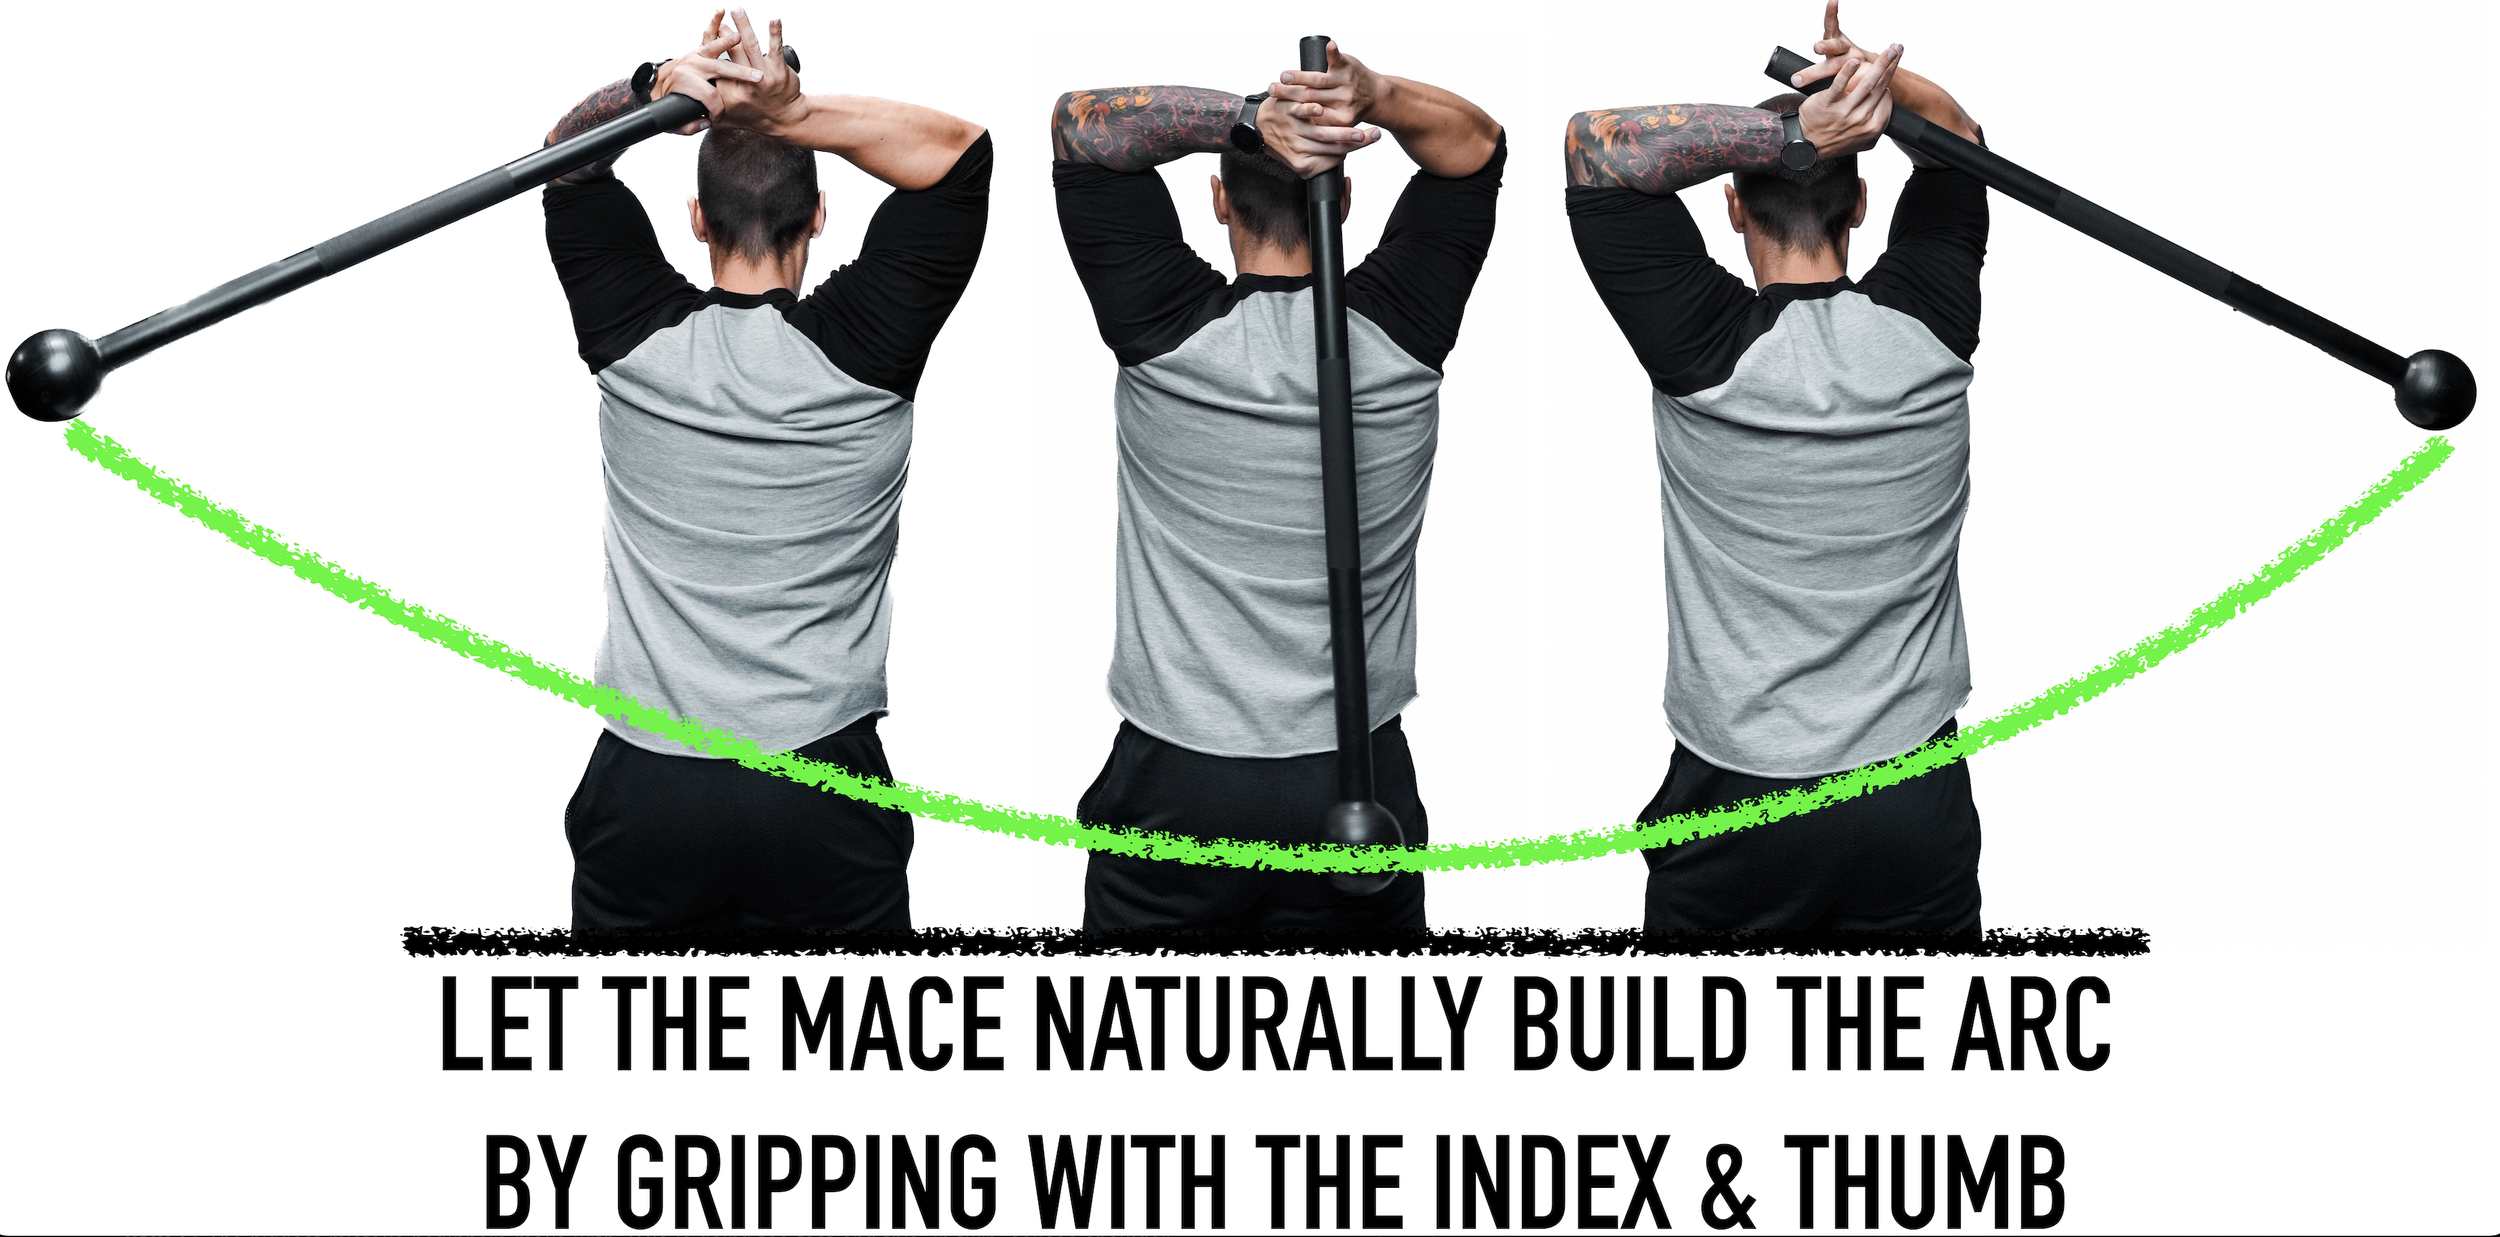
PENDULUM: Practicing this alone can help build the thoracic extension and fluid like grip needed to make your 360s smoother and not jagged looking. Since you can’t see the mace once it’s behind you many fear of it hitting their butt and death grip thinking this will prevent it. First, if it hits your butt (it really doesn’t hurt) this means your hyperextending your low back. So view it as tactical feedback from the steel mace saying “STOP using your low back to swing me!” The pendulum needs uninterrupted acceleration to build a smooth arc and the trick is to grip with your index & thumb. Just like with kettlebell cleans — your hands need to relax for a split second so the bell can rotate around the wrist or else it slams against your forearm from death gripping.
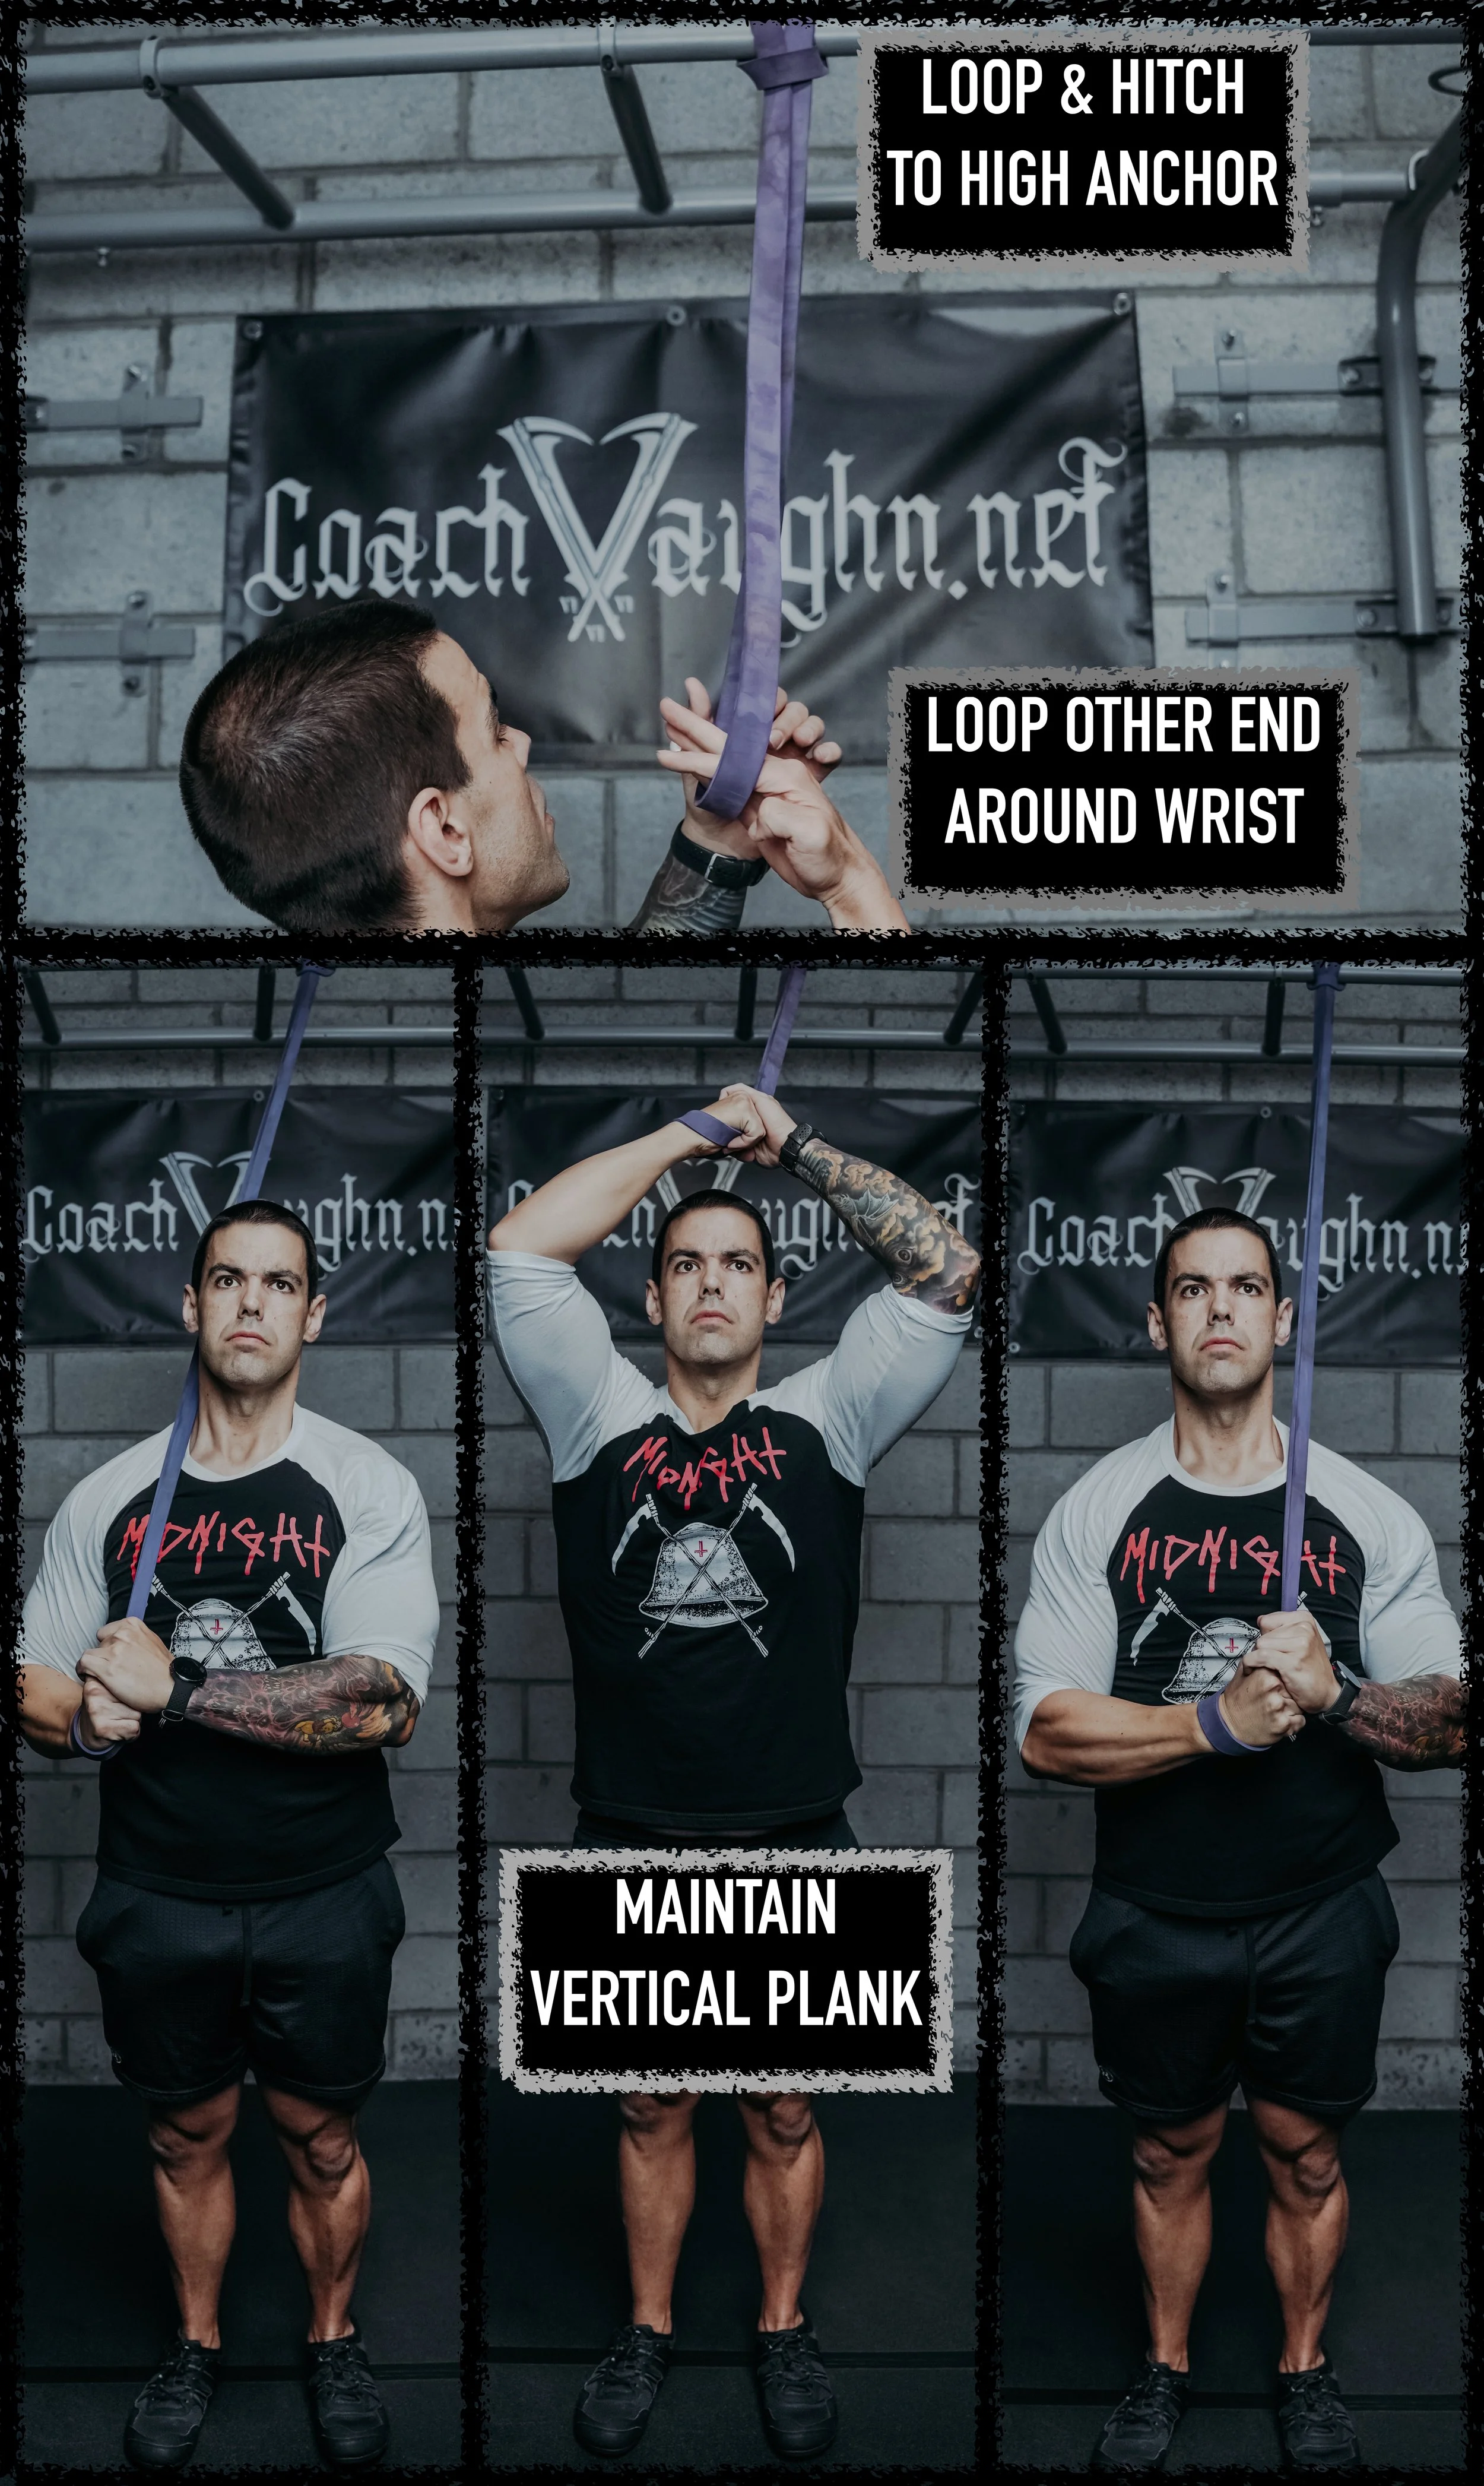
PULL: This is where the lats need to take over the accelerated force from the pendulum. With that said, I’ve never been a fan of shouldering the mace handle because it puts more emphasis on loading your spine with excessively rounded torso rotation. For classic Gada training, this shouldering technique works better because smooth handled wood/bamboo is more forgiving than the knurled steel gliding across your clavicle’s skin. To enforce this needed lat contraction and to challenge your vertical plank I came up with the Banded 10 & 2:
PAUSE: The biggest mistake beginners make with 360s is going too fast and this, in turn, causes shoulder impingement and elbow pain for doing too many reps this fast. This also takes away the centrifugal force needed to maintain the 360 degree motion smoothly and sends it into more jagged directions (bottom). All you have to do is PAUSE in the vertical stack position for a slight second before you repeat the process. This gets your grip stronger and resets your shoulders to make sure they’re not elevating up toward the neck. As Bruce Lee famously states: “if you can’t do it slow . . . then you can’t do it fast.”
PUTTING IT ALL TOGETHER: Watch this video
So what you just got was a preview of only 6 pages from Enter The Steel Mace — out the 100+ pages with loads of experienced tips. The book also has 40 more exercises far beyond typical 2 handed 360s and a special QR code to download the steel mace beginner workout program in PDF file format (with all the exercises hyperlinked to video demos). You can get the book in paperback or ebook format on Amazon linked HERE:
Steel Mace Training FAQ

Custom Steel Mace Rack
In the last month, my YouTube channel has exploded with hundreds of new subscribers interested in steel maces (with the recent events of course). So with this came a lot of good questions that many beginners have. So I put together this Steel Mace Training FAQ video together in detail to help bring a better understanding to this great fitness tool — answering these most commonly asked questions:
1. "Where Did You Get The Steel Mace Rack?"
2. "This is Stupid...Just Use A SledgeHammer?"
3. "Where Do I Buy Steel Maces?"
4. "How Heavy Should I Go?"
5. "Why Do My Shoulders Hurt With 360s?"
6. "Which Hand Pushes& Pulls For 360s?"
EVERYTHING LISTED IN THIS VIDEO IS HYPERLINKED BELOW
Article Link: Differences Between Steel Maces & Sledgehammers

Where to Get Steel Maces?
Article Link - Steel Mace Weight Recommendations
Steel Mace Workouts- Coach Vaughn's Steel Mace YouTube Playlist
For more tips on how to workout with steel maces be sure to check out my ebooks full of educational chapters, tutorials breaking down essential techniques to attain strength with them, and program workouts for all beginner, intermediate, and advanced levels. Use the codes below at checkout, bundle saving 25%, or buy 3-4 ebook and get one FREE below linked here.
Why Your Kettlebell Clean Sucks

The kettlebell clean is the easiest to do, but the hardest to learn. Beginners show frustration with this as the kettlebell slams onto their forearm in the front rack position. I wasn’t perfect when first learning either, but when I finally got it I thought “why didn’t someone tell me this all along?” So I want to get straight to the point what issues need to be fixed for a SMOOTH kettlebell clean and why a solid front rack matters.
Issue #1: It’s Slamming Because You’re Death Gripping
What draws a beginner away from the kettlebell clean is the slamming effect caused from over gripping the handle. The kettlebell NEEDS to rotate around the wrist — so therefore your grip need to relax for a split mili-second to do so. This is easily taught with a light kettlebell and performing a simple curl (with no hip hinge). When performing your hands & fingers will require smooth dexterity so it can rotate. You want to think, “zip up the jacket” to keep your elbow connected to your torso as well. Once you have a understanding of this, you can perform a Deadstop Clean — all featured in the tutorial below:
Issue #2: Front Rack Position is Weak
No good comes to kettlebells with flexed wrists and a weak grip. As you see below, you want the forearms vertical (with singles or doubles) with a SECURE grip. The most common compensation many make is “chicken winging” the kettlebells onto the forearms like a shelf with the wrists flexed (cutting off any engagement from the lats) as you see pictured below.

Issue #3: Pulling the Kettlebell With No Hip Power
Before learning kettlebell cleans, your skills with a two (2H) and one handed (1H) swing should be solid. This is so you can translate the same hip power to the clean. You want to think a kettlebell clean IS A SWING that’s ends in front rack position. So if you perform 1H swing to a clean…I should see the hips look exactly the same. I shouldn’t see a powerful 1H swing…then a weak clean with the kettlebell being pulled up as demoed below:
Issue #4: Over Rotating the Torso With The 1H Clean
What a lot of beginners don’t know is it’s actually easier do kettlebell double cleans because it keeps your shoulders & hips square as you ballistically hip hinge. It’s harder with singles because your free side wants to rotate toward the asymmetrically loaded side. When the torso over rotates at the back swing (or hike) position…you’re more likely to dump your shoulder forward with it and makes you go unnecessarily faster to compensate. So a the double clean’s extra load makes you slow down in the front rack by pausing — keeping the shoulders connected to your lats (not hugging toward the kettlebells). Take notice of my pace with the kettlebell double cleans demoed below:
If you feel you need more work on kettlebell doubles be sure also check out my other related article: Double Kettlebell Swings For Double The Strength. You also get more correctives like this in all my ebooks. You can use the codes below to save on any of them or checkout the bundle deals all linked HERE.
Kettlebell Double Swings For Double The Strength

What I’ve always loved about kettlebells is all the different type of swings you can do with them. However, many beginners strictly associate kettlebell swings with the classic two handed version. This is why is my first volume of GADA Swing: Guide for Kettlebell & Steel Mace Strength Training I utilize a SINGLE kettlebell for the entire program so you learn the differences between two handed, one handed, and hand to hand swings throughout the education chapters. Then in GADA Swing Volume 2, I advance the programming into Kettlebell Doubles & Heavy Maces. I make these skills detailed and structured because all too often people rush their skills advancing into kettlebell doubles due to poor social media influence. So I’m going to show you the proper way of educating you the differences between a single & double kettlebell swing and how to execute them with good technique so you can advance them into more kettlebell double swing variations.
How to Set Up Kettlebell Doubles:
The U.S Army has a saying “same standards, different conditions” when advancing certain skills. You’re standards of keeping a neutral spine with a dominant hip hinge position in the set up will remain, but the changing condition here is we need a wider (sumo deadlift like) stance so the kettlebells can travel in between your legs without banging into your legs. It is also key to point your toes OUTWARD at a 30-45 degree angle so the knees can also push out; as the hips flex back and explode into extension with more glute contraction. With a wider stance, your hips must produce more ballistic power or else your knees will compensate caving inward (valgus) to make up the lack of power.

The devil is in the details as you also notice how my shoulders align toward the kettlebells in a tilted position (packing into my lats) so they can naturally hike up into the back swing (above the knees). If your shoulders are in a shrugged position you will more likely compensate by pulling the kettlebells versus actually naturally swinging them.
Executing with Consistent Power:
Kettlebell Double Deadstop Swings are best if someone’s reps that look great for the first couple, but absolutely suck on the last reps. This also corrects the head position by “looking 6FT ahead.” You do NOT want to look up & down as you swing kettlebells because this kinks the neck and decreases neural engagement to your lats. Slight neck extension is okay, but I shouldn’t see a major skin crease on the back of your neck at the same time.
Going FULL Swing
Once you own a proper set up and own the skills for a explosive hip hinge — you can go full swing. Notice in the demo below, my hips maximally flexed with minimal knee flexion as I look 6 feet ahead. Then as soon as your hips extend, the arms should release away from the torso as the kettlebells float as the body vertical plank.
Advancing into Cleans & Snatches
If I were to take a picture of your backswing…I shouldn’t be able to tell if you’re about to do a swing, clean, or snatch. I bring this up because commonly when I advance a student with cleans or snatches…all their hip power disappears. Think a clean is a swing that ends in the rack position and a snatch is a swing that ends overhead. This is best learned when performing each one into a kettlebell double swing complex as you see below.
Notice how my power of each swing variation in executed from everything we’ve talking about it: the set up with a wider stance, feet at 45, kettlebells tilted, and hiked above the knees into a solid hip hinge. Pause the video in each rep of the backswing and it’s the same every time I ascend into a swing, clean, or snatch. If you feel you need more work on your clean or snatch technique — check out my related articles: Why Your Kettlebell Clean Sucks or Why Your Kettlebell Snatch Sucks.
So I hope I gave you a more educated influence HOW to swing kettlebells with doubles. Remember to take your time when learning and keep the reps minimal (5-10) so you can maintain power. It also never hurts to have a set of experienced eyes give you feedback. Be sure to checkout my latest ebook: GADA Swing Volume 2: Guide For Kettlebell Doubles & Heavy Mace Training featuring Stick Mobility with Bonus Steel Club Sub Options for 40 programmed workouts. You can also bundle it with the first volume to save 25% off your purchase — CLICK HERE

How To Go Heavier With Steel Maces
About half the people I see online performing heavy mace swings…have no business doing so. Their shoulders shrug up into their neck, face turns red from not breathing, unstable feet rocking, and twisting the torso into their low back (rounding the thoracic spine) because they’re not bracing enough. A key training principle I’ve learned from StrongFirst is if you wouldn’t do it with a 48KG/106LB kettlebell…you shouldn’t do it with a 24KG/53LB kettlebell. The same applies swinging heavier maces (that’s a 16KG/35LB mace pictured below). Now, I’m not saying by any degree you need to go from lifting a 15LB to a 35LB mace overnight. More so, to just lift 5-10LBS heavier than your medium sized steel mace to get to the next level. So I’ve put together some solid tips I’ve learned over the years swinging heavier steel maces.

Push & Pull Heavy Maces — BEFORE Doing 360’s:
I never teach beginners steel mace 360’s right off the bat and the same goes for HEAVY mace 360’s as well. It’s completely false that you need to do hundreds of reps in order to get good at them in each workout. It’s more so what you NEED to engage and not using. Activating the lats (the big muscle wings of your back) is what stabilizes the steel mace in the vertical stack position or else you start death gripping the mace handle to the point your spine rounds and traps shrug into it. So HEAVY Mace Squat Pressouts help correct this as you see demoed below:
Root Your Feet With Good Technique
A big strength component with grip training is NOT just with your hands, but with your feet. When I assess ANY type of swing being performed…the first thing I look at is the feet. Usually the issue is wearing cushy soled shoes and it’s instantly resolved when they’re taken off. If the feet are cramped inside a small toe box or elevated in the heel of the shoe —there’s always instability from the ground up. So this is where I use a 9FT balance beam to expose any of these imbalances and makes your medium sized mace feel heavy again. Simply swing and THEN step each rep barefoot on the balance beam demoed below:
PAUSE After Each Rep
The faster you 360 a HEAVY steel mace…the more heavy it gets. To better explain this, no one but Pavel tells it best on how speed & velocity equals more load:“If I put a 16KG kettlebell on your foot you’d be annoyed. If I then dropped it from your knee height…it might break. If I dropped it from your head down…you will need a whole new foot.” So if the mace spins around you faster & faster…your ligaments and tendons are taking the beating and is why I see many steel mace enthusiasts have jacked up elbows and wear compression sleeves to avoid the issue. However, when I swing heavier…I simply take my time adding a slight PAUSE in the vertical stack position so I keep the gained velocity in check.
As you see in the demo, you can swing a solid 2 reps in 8 seconds or 4 bad reps in the same time. Progressively swinging faster looks uglier, uncoordinated, and are unsustainable in a long term program. So think of the Four P’s when performing HEAVY mace 360’s: “Push, Pendulum, Pull, Pause” each rep.
Get Flexible After With The Stick Mobility Bow & Arrow

The Stick Mobility Bow & Arrow is a MUST for me after swinging that 16KG/35LB Mace…one handed
Recently, I added Stick Mobility drills to latest ebook, GADA Swing Volume 2, because HEAVY Mace is training is apart of the progressive program. Like many, when I first heard of Stick Mobility, I instantly disregarded it because I thought you could use any other wooden stick instead of a “overrated orange stick”. Little did I know, I was thinking just like a Fitness McGuyver: thinking a sledgehammer is just the same as a steel mace (article HERE).
Why these resilient sticks work better is because they root into the ground with the rubber ends to increase surface friction. They also can greatly bend and go back to their natural straight shape as you see here in the Bow & Arrow position. If you use any other bendable material it will become more curved after each use until it breaks in half dangerously.
So I hope you got some good tips out of this article on how to go heavier with your steel mace safely. If you want to see more, be sure to check out GADA Swing Volume 2: Guide for Kettlebell Doubles & Heavy Mace Strength Training. It features Stick Mobility Drills with bonus Steel Club substituting in the workout programs and has over 300+ hyperlinked demos for every exercise. You also get MORE critical skills on how to properly lift heavier maces and add balance beam drills to better prime stability from the ground and up. Use code: GS210 to save at checkout — CLICK HERE to go the next level. You also can bundle it with the first volume saving 25% HERE

Differences Between Kettlebells & Steel Clubs
Since the first time I ever set hands on a kettlebell and swung it in 2006 I’ve been a constant student on mastering my techniques. Like many, I picked up one of Pavel’s books because there was really nothing else out there during that time. Then, as soon as I had the income to save up for my StrongFirst Kettlebell certification I became even more addicted to kettlebells. Fast forwarding to now, kettlebells are at an all time high popularity and it’s common to hear the title “kettlebell enthusiast.” If you’ve invested thousands on cast iron kettlebells over the years, attended courses, take pride walking around barefoot, can say “comrade!” like Pavel, have your own courage corner (because corporate gyms don’t have real kettlebells)…..congrats, you’re a kettlebell enthusiast.
Now contesting my long love for kettlebells I have to admit my short comings with them…they get boring after a decade of training with them. “It’s NOT you kettlebell…it’s me.” Seriously, it’s really not the tool or the style of training — it’s more so we need new challenges at some point to keep us going in the long run. I found steel clubs (or what some call heavy clubs) in 2015, and during that time I felt I needed something new in my workouts to challenge me. So I want to break down why a kettlebell enthusiast would find steel clubs as a possible interest to invest in. To be clear, I’m posting this article more so that you’ll appreciate kettlebells even more (not less) after utilizing steel clubs like I have.
Steel Clubs Swing Better Outside The Hips
Even before I got into steel clubs I thought performing double kettlebell “skier swings” were down right stupid and dangerous. Why? First, the kettlebell’s mass has a HIGH chance smacking the outside of your knees. Second, to avoid getting hit this causes the knees to cave in (valgus) during the back swing phase. There’s a reason why kettlebells are swung, cleaned, and snatched from inside the hips to better load up the hamstrings.

However, when the steel club’s elongated shape is swung from outside the hips it really feels like you’re loading up into a broad jump because the clubs shape can travel further in the back swing better than double kettlebells. Not only that, with the torch like grip against the handle the wrist laterally extends causing more extension along arms with more range of motion for the outside swing. This the major game changer for swings with steel clubs versus using kettlebells. Watch the tutorial to see the the true difference:
Steel Clubs Are Perfect For Your Medium Lift Days
In StrongFirst we have a saying, “if you have heavy days…you don’t need light days.” This doesn’t mean lift heavy every day, but I’m not sorry saying dancing around with a light kettlebell will not do anything for your strength at the same time (Onnit makes good equipment…not education). So having medium lift days are good days to perfect your technique. What’s great about steel clubs is you don’t need a lot of weight to have a good workout with them. While a 45lb kettlebell maybe be no problem for you…that’s a completely different story with a 45lb steel club. I recommend beginner men go no heavier than 15lb clubs and women go higher than 10lbs with doubles.
A great example for a medium lift day would be windmills. They are a major favorite among kettlebell enthusiasts to attain flexibility, t-spine mobility, and shoulder resilience for lat engagement. Among playing with the steel clubs one day I tried them with windmills and it was more challenging than I thought (especially with doubles). Once again the torch grip is what makes this so tough. With so much stability needed the index and thumb really have to work hard to crush grip the handle. Check out the video tutorial below to see what I mean:
Steel Club Swipes & Kettlebell Snatches Similarities
If there’s any steel club exercise that resembles the kettlebell snatch it’s steel club swipes. What makes the kettlebell snatch technique so hard to learn at first is NOT ripping up your hands (related article: Why Your Kettlebell Snatch Sucks). Having the same finger dexterity to bypass scratching up the meat of the palm is also required for the double swipe. What I also love about swipes is it enforces abdominal bracing from the club’s weight in the accelerated pull over position. So this means your breathing mechanics ALSO have to be on point (just like the snatch).
I hope I gave you, the kettlebell enthusiast, a different look on how to apply what we already know into steel clubs and challenge our skills. If you’d like to learn more about steel clubs and workouts for them I have plenty more articles like Beginner Guide for Steel Clubs and Steel Club Double Workouts linked here. I also have an entire ebook program, GADA Club: Guide for Indian & Steel Club Strength Training, on how to build your skills with them in the education chapters with indian clubs; having 40 workouts split into beginner, intermediate and advanced levels for singles and doubles (all included with over 150+ hyperlinked videos in the PDF file). Be sure to use promo code: GOINGCLUBBING10 to save at check out.

Steel Mace Weight Recommendations

So you got an interest in steel maces and you’re wondering now “why are the weight selections so light?” This is what throws people off whether you’re strong or just beginning your journey into fitness. So you buy a mace that’s around 20-25lbs, get it delivered, and start playing around with it and then realize…”oh crap, this is TOO heavy for me.” If you made this mistake you’re not the only one. These are a couple of comments left from my Youtube subscribers for my steel mace workouts:


So why does this tool feel so heavy at first? A steel mace is an asymmetrically (one side) loaded tool with all the weight in the mace head and no less than a pound in the handle. So we’re not talking about a dumbbell or kettlebell here. Once you get the mace into a vertical stacked position your grip, lats (big muscle wings of your back), and posture instantly get challenged to resist the steel mace’s weight distribution being over your head. This is what makes the steel mace such a unique tool because you can increase your overall strength with little weight since the steel mace exposes all the places you lack mobility or stability. To be clear, steel maces and sledgehammers are NOT the same and I wrote a whole other article on it here.
So which steel mace is best for me then? First, please be humble and take your ego out of the mix whether your experienced with other tools or not. If you want to get the MOST out of your steel mace training you need to pick a weight size that allows you to do the most quality movements. The heavier you go…the less you can do with it. Another big thing many don’t realize is steel mace training doesn't just train your muscles, but also tendons and ligaments. So they do not recover as fast as your muscles and you need to be patient letting your tendons (especially in your elbows) get used to the weight you’re using. The best weights selections I’ve found are:
MEN: 10-15LBs
WOMEN: 7-10LBs